Using Nintendo Switch can sometimes be confusing: I wish I had a helpful how-to guide when I bought my Nintendo Switch in early 2017.
That is why I created this handy, detailed—yet beginner friendly—Nintendo Switch tutorial. Just for you.
Who is this Guide For?
This Nintendo Switch guide will teach you how to use your Nintendo Switch system by navigating through the Nintendo Switch’s different menus. If you own a Nintendo Switch, are thinking about buying a Nintendo Switch, or you are thinking about gifting a Nintendo Switch, this guide is meant for you.
You might be new to gaming or a long time fan; you may already know a lot about the Nintendo Switch, read a Nintendo Switch review or two, or you may know nothing at all–this guide is still meant for you. Lastly, if you are interested in learning the basics of the Nintendo Switch by looking over its many menus (and the features tucked inside those menus), you are 100% in the right place.
You may be asking yourself, how does Nintendo Switch work? By reading this guide, you will better understand what your Nintendo Switch can do way much more than you understood before. We will be diving deep into the main menus on the Nintendo Switch home screen one by one to ensure you walk away with detailed knowledge of Nintendo Switch features hidden deep within the console’s menus.
The Nintendo Switch home screen supplies the most important menu icons for users. These menu icons are shortcuts that take you to a dedicated page all about that shortcut. For example, the “Album” icon at the bottom of the Nintendo Switch home screen will take you to a dedicated page all about viewing, managing, deleting, and editing your Nintendo Switch screenshots and videos. Think of the six circular icons on the Nintendo Switch home screen as separate Nintendo Switch apps that allow you to do different things.
Being knowledgeable of the Nintendo Switch “apps” will allow you to get the most value and use from your Nintendo Switch console. I know I am able to better navigate through the Nintendo Switch, find functions quicker than ever before, and know just where to go ever since I educated myself on everything the Nintendo Switch can do.
I hope you enjoy this Nintendo Switch tutorial as much as I had putting it together for you. Feel free to bookmark this page if you find it useful, share, and come back to it whenever you feel the need.
Your friend,
Walapie Gamer
Contents
The Nintendo Switch Home Screen explained
Navigating the Nintendo Switch Home Screen
Learn about Nintendo Switch User Profiles
Learn how to turn the Nintendo Switch off
-Read How to use your Nintendo Switch Part 2 Now-
PART 2: Learn about Nintendo Switch News Menu
PART 2: Learn about Nintendo Switch Nintendo eShop Menu
PART 2: Learn about Nintendo Switch Album Menu
PART 2: Learn about Nintendo Switch Controllers Menu
PART 2: Learn about Nintendo Switch System Settings Menu
PART 2: Learn about Nintendo Switch Sleep Mode Menu
If you want to learn about the six important Nintendo Switch menu icons (a must-read for all Nintendo Switch enthusiasts), head to How to Use Your Nintendo Switch Part 2.
Getting Started
Is Your Nintendo Switch Turned on?
Before we start using Nintendo Switch, make sure your Nintendo Switch console is turned on. If you are gifting a Nintendo Switch or are thinking about getting one, skip this step and head to Navigating the Nintendo Switch Home Screen section.
Turn on your Nintendo Switch by holding the power button on the top of the Nintendo Switch until the Nintendo logo appears on the screen.
If your Nintendo Switch is in sleep mode, simply press the power button on the top of the Nintendo Switch instead of holding it.
These are the simplest methods to powering on the Nintendo Switch system.
What to do if your Nintendo Switch doesn’t turn on?
It has happened to all of us in this electronic-gadget dominated age sometime before: you pressed power but the device didn’t turn on. The same can happen with the Nintendo Switch, but don’t panic.
The most common reason for the Nintendo Switch not powering on is because the Nintendo Switch’s battery is drained and needs to be recharged.
First, remove the Nintendo Switch system from the Nintendo Switch Dock and attach the Joy-Con controllers to both sides of the device.
Second, remove the Nintendo Switch AC power adapter from the wall socket and the Nintendo Switch for at least 30 seconds to 1 minute. This will ensure your Nintendo Switch system will achieve a clean, fresh reset so it can start charging again.
Third, plug the Nintendo Switch AC power adapter into a reliable and available wall socket.
Alternatively, placing the Nintendo Switch into the Nintendo Switch Dock with the Dock connected to a power outlet via the Nintendo Switch AC adapter power cord will also charge the Nintendo Switch system. The choice is up to you.
Either way, I highly recommend only using official Nintendo Switch AC adapter power cords. Nintendo ONLY recommends the use of their official charging cables, and I would trust them.
I have had bad experiences in the past with unofficial charging cables either ruining my gaming hardware or draining my battery when, instead, it should have been charging the device.
Always buy official charging cables. They might cost a little more than unofficial alternatives but the extra money is worth the security, your peace of mind, and the health of your Nintendo Switch in the long run.
Allow your Nintendo Switch time to charge once you have chosen the best charging method for you. If done correctly, a charging symbol will appear on screen. It is estimated to take 3 hours to fully charge a Nintendo Switch System giving you plenty of time to finish this Nintendo Switch tutorial.
Thanks, but my Nintendo Switch still won’t turn on!
Bummer! These are the methods I have used if I think my Nintendo Switch isn’t charging.
- It might be due to a faulty Nintendo Switch AC adapter power cord.
- It might be due to a faulty Nintendo Switch Dock
- It might be due to a faulty surge protector.
If you find that your Nintendo Switch is still not charging, connect your Nintendo Switch directly into a reliable and available wall socket with the Nintendo Switch AC adapter.
Check your surge protector for signs of wire damage or power failure.
Also, check your Nintendo Switch AC adapter cord for damages. You may have to replace the power cord if all else fails. Keep this in mind.
Now that your Nintendo Switch is fully powered and ready to go, it’s time to take a detailed look at the home screen.
The Nintendo Switch Home Screen explained
But first, what is the Nintendo Switch home screen?
Simple. It is the central location where all of your Nintendo Switch games, apps, and functions are kept.
The home screen is the central hub of your Nintendo Switch system in which everything you can do on your Nintendo Switch is connected.
Navigating the Nintendo Switch Home Screen and Menus
Let us take a look at the Nintendo Switch home screen now that you know what it is.
The home screen is clean, fast, elegant, and lacks clutter that often slows down electronics. Nintendo designed the Nintendo Switch user interface and menus to be sleek, responsive, and quick in order to satisfy the user’s needs.
The Nintendo Switch home screen does all of these things and is a portal to your Nintendo Switch suite of features. If you like a quick clean interface, you will love the Nintendo Switch.
Now, let’s take a look at the Nintendo Switch home screen from top to bottom.
The Top of the Nintendo Switch Home Screen
You will find a variety of information at the top of the Nintendo Switch home screen, from left to right:
- User profiles
- Current time
- Internet Connection status
- Battery charge
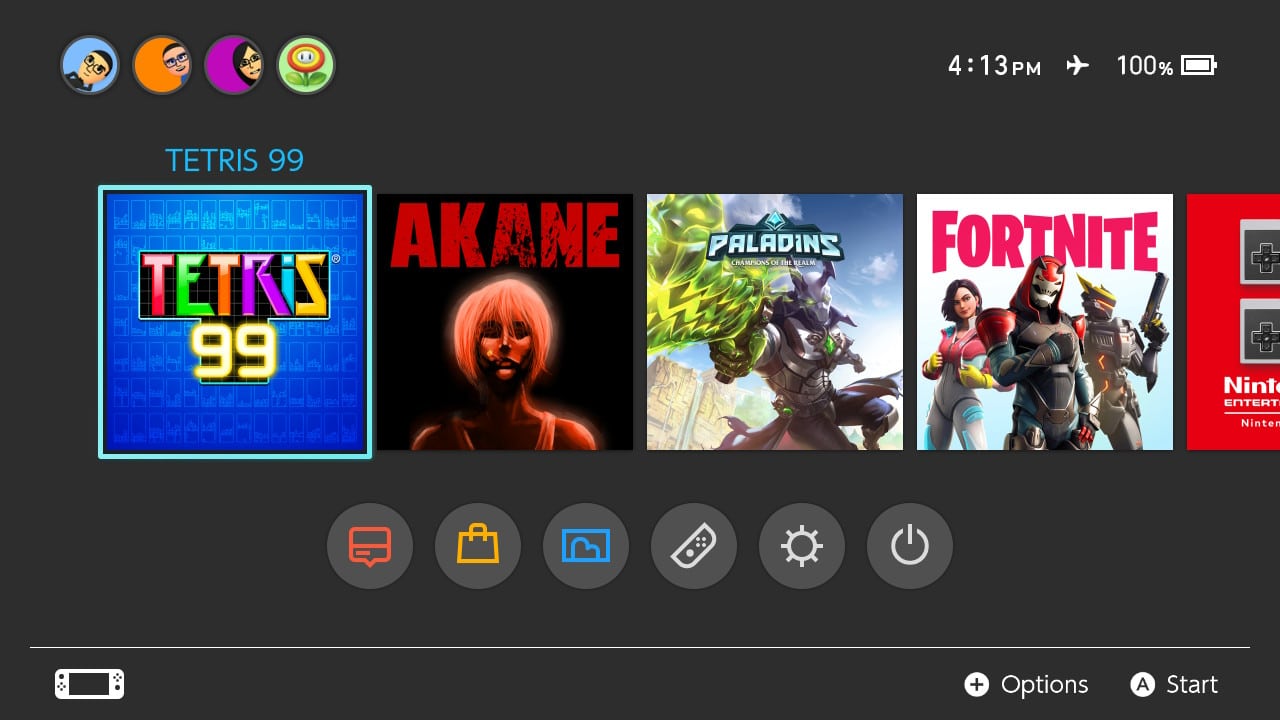
User profiles connected to the Nintendo Switch are represented by their profile picture and backgrounds within small circles at the top left of the screen.
The current time, internet connection status, and the amount of battery the Nintendo Switch system has remaining is located to the top right of the screen.
I find the battery remaining percentage and icon to be really useful when playing away from a television. It has helped me to save often and to know exactly how much longer I can play my Nintendo Switch before attaching it to a power outlet. I suggest keeping an eye on your remaining battery in times of intense game sessions.
The Middle of the Nintendo Switch Home Screen
You will find your software carousel in the middle of the Nintendo Switch home screen. This is a cool way to see all of the games you have ever played.
Because, all games and software you have either download (including demos) or game cards you have inserted into your Nintendo Switch will appear here as large square icons. Each icon will depict a scene from the game, the game’s logo, or a piece of recognizable art to make sure you know what game the icon belongs to.
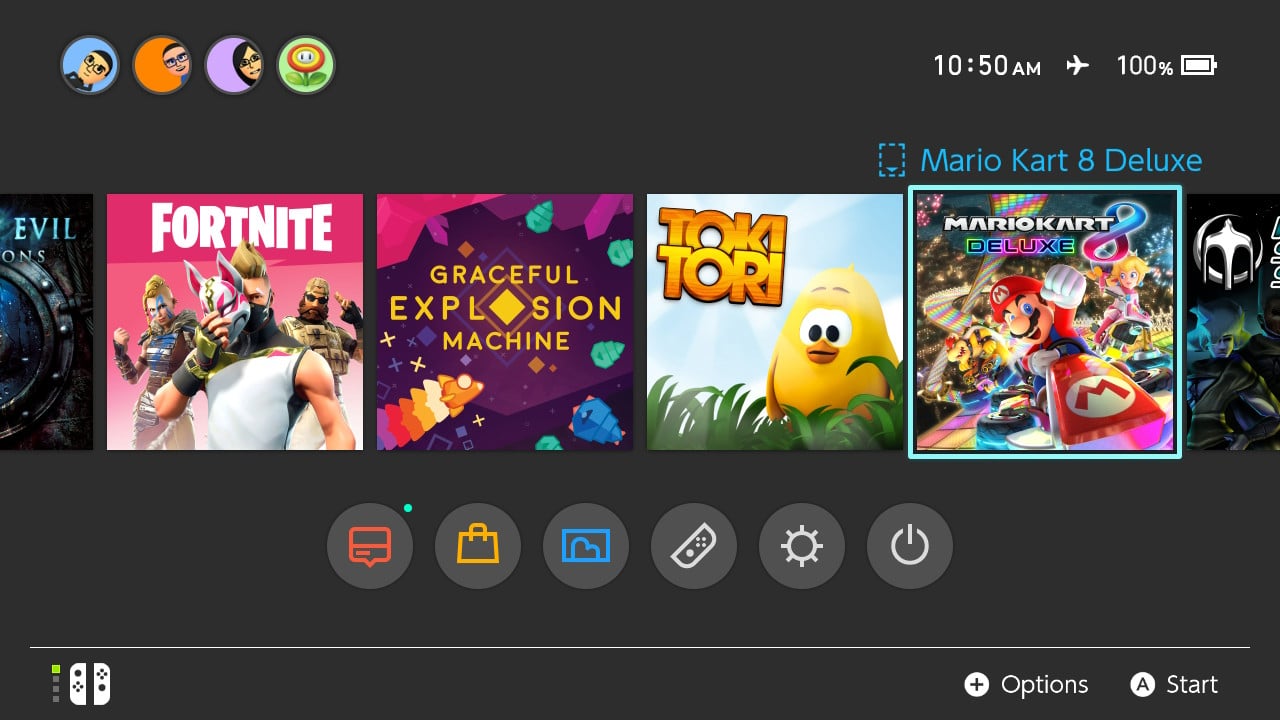
Placing the cursor on the game icon will select it. Once selected, the name of the game will scroll above the game icon and a small game card image will appear next to the name if is the physical version:
- A solid blue game card image means you have the game card inserted into the Nintendo Switch game slot.
- A dotted blue and empty game card image means you DO NOT have the card inserted into the Nintendo Switch game slot.
You can scroll through the software you have played from left and right and in reverse to see all of your content.
If you have played more than 12 Nintendo Switch software applications, a new menu icon to the right of the software carousel will appear. A round button with four squares inside label “All Software” should appear.
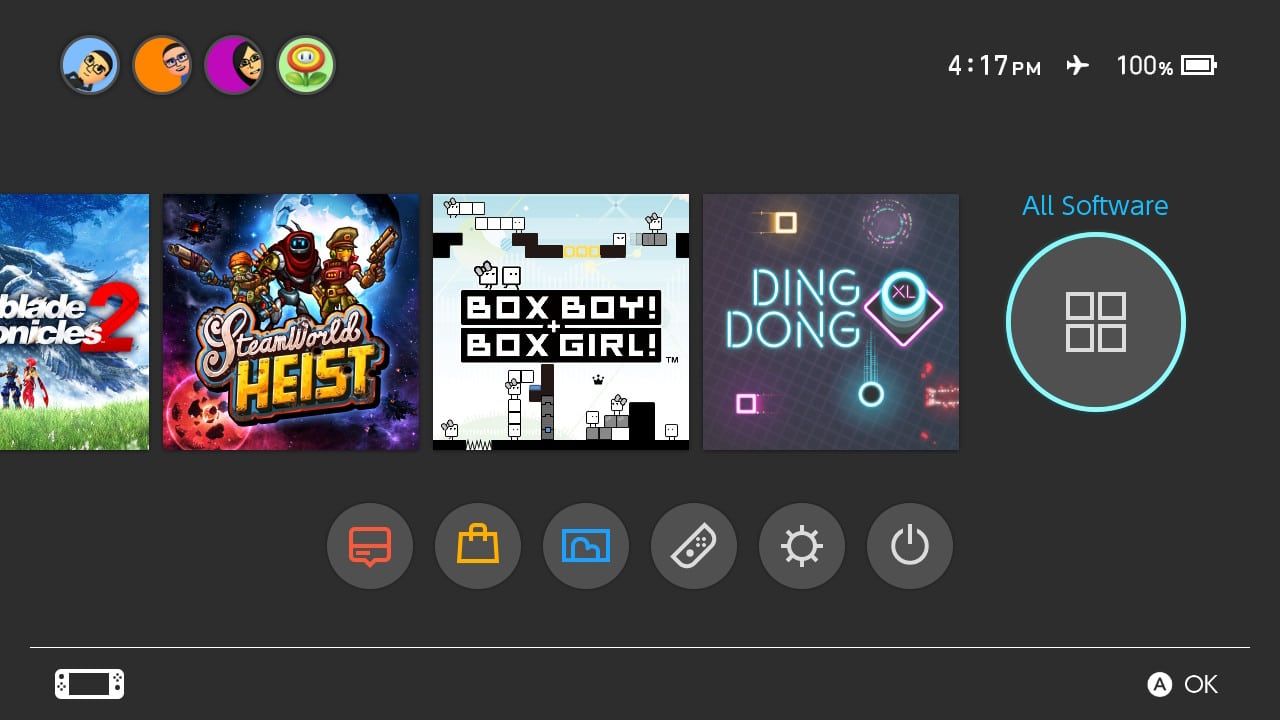
Pressing the A button while the All Software menu button is selected will take you to a new screen that showcases all of your software in a grid-based form. This view is great for viewing dozens upon dozens of games which is why Nintendo designed it only to appear after playing and acquiring 12 software applications.
Press the B button to return to the Nintendo Switch home screen. Now, we can check out the screen’s bottom portion.
The Bottom of the Nintendo Switch Home Screen
An icon representing connected controllers is viewable at the bottom left of the screen while informative context-sensitive button prompts show on the bottom right. Depending on what menu icon or button you select, the button prompts at the bottom of the screen will change to let you know what appropriate buttons do.
The main two buttons I suggest you learn are the A and B buttons. These two do the most work throughout all Nintendo Switch menus and are pretty easy to remember.
- A button will almost always be used to accept, confirm, or okay selections.
- B button will almost always be used to back out, decline, or cancel selections.
Here is a shorthand way I use to remember these two buttons: A is to “accept” and B means “back”. See! I told you it would be easy to remember.
Finally, at the bottom of the Nintendo Switch home screen are six primary navigation icons: News, Nintendo eShop, Album, Controllers, System Settings, and Sleep Mode from left to right. This is where most of your Nintendo Switch system fun will happen, but more on these six in Part 2 of this handy guide. Jump to Part 2 if you want to know more about these six incredibly useful Nintendo Switch features or continue reading this helpful Nintendo Switch tutorial first
Now, let us take a detailed look at the Nintendo Switch user profiles at the top left of the screen. Anyone curious about Nintendo Switch needs to know how user profiles work in order to use and take advantage of the system’s wealth of features. Luckily, I am here to explain it all to you.
Learn about Nintendo Switch User Profiles
Nintendo Switch User profiles empowers players to create unique representations of themselves that tracks Nintendo Switch gaming information and allows players to interact with other Nintendo Switch owners locally and online.
Players can personalize their user profile with a character and background and unique nickname. I chose to use a Mii character I created and migrated from my Nintendo Wii U console with an orange background with the name WalapieGMR. The best news is that users can change their image, background, and nickname at any time whenever the mood strikes.
Up to 8 profiles can be made and stored on one Nintendo Switch system. This is usually enough for a single household or a family. Even an individual who wants to have multiple accounts for whatever reason will find that 8 Nintendo Switch user profiles more than enough.
Through personal experience, I use 4 profiles: one for my personal account, one for my Walapie Gamer account, one for my spouse’s account, and one as a “guest” account for friends. This way, everyone can jump in at any given time and I still have 4 available user profile spaces left. Yay!
But what if you did make 8 user profiles and you wanted to get rid of a couple? Or 4? Or all 8?
You will be happy to know that each user profile can be deleted, and transferred to other Nintendo Switch consoles, by navigating to the “System Settings” menu icon on the Nintendo Switch home screen and then selecting the “Users” tab (the user profile order that appears on the top left of the home screen can also be changed here).
Now, it is time to take an in-depth look at the features available on a Nintendo Switch user profiles User Page.
To get to a User Page, move your cursor and highlight a user at the top left of the screen. A Blue circle will pulse around the selected user profile. Press the A button to accept your selection and you will be brought to that profile’s User Page.
Nintendo Switch User Page
The Nintendo Switch User Page screen is where you will find all the settings needed to personalize and tweak your Nintendo Switch User profile.
Create the persona of your dreams in the following menus that appear on the left side of the screen (listed in order from top to bottom):
- Profile
- Friend List
- Friend Suggestions
- Add Friends
- User Settings
The Nintendo Switch user page is very powerful in helping you create your personalized gaming persona. Let us take a look at each of the 5 menus listed above.
Profile
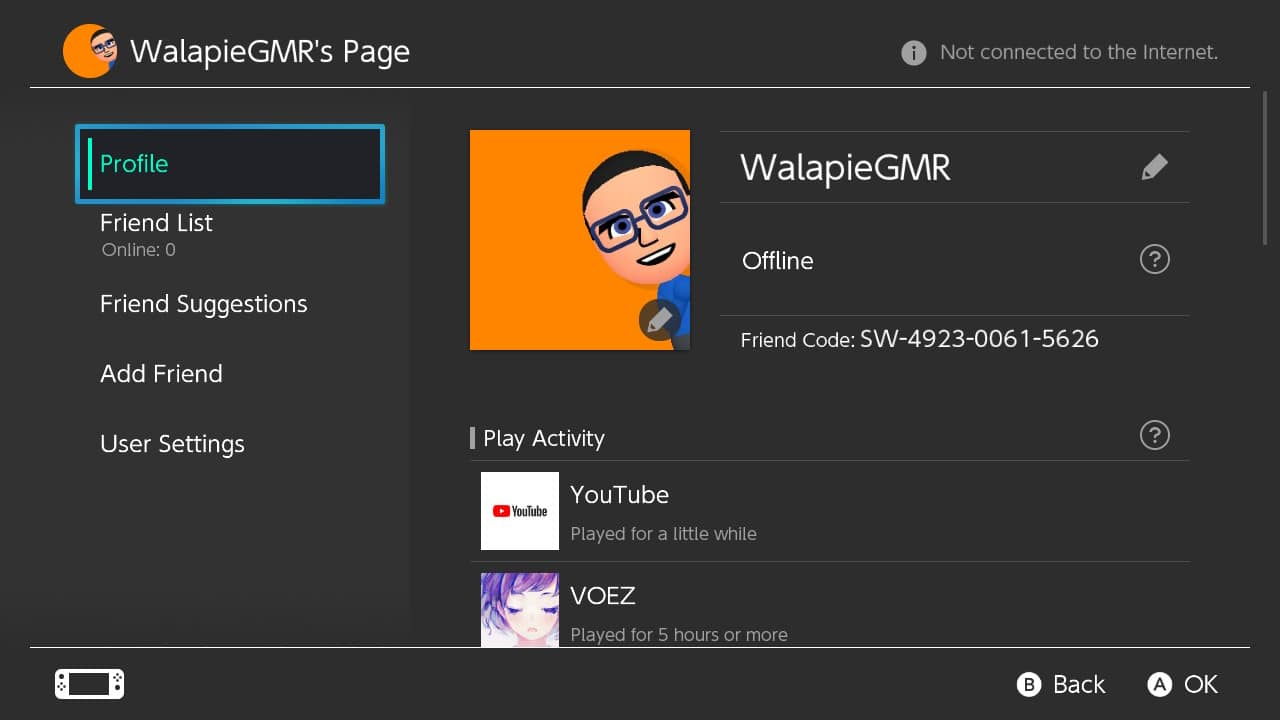
You can edit your user Nickname and profile picture. Just select the user picture to the right of the screen and press the A button to be taken to the “Edit Icon” screen.
You can view your online status. This section will show what game you are actively playing if you are in a game while connected to the internet. Additionally, your friends will be able to see your online status if they look at your profile while you are in a game.
If you are in the eShop or are connected to the internet but you are not in a game (perhaps you are navigating through the Nintendo Switch’s menus), your online status will be set to “Offline”.
You can view your Nintendo Switch Friend Code. Your Friend Code is one way to add friends to your friend list so you can play online with other people. A Friend Code is a string of numbers that represent your user profile as is unique to you.
You can give your Friend Code to friends, family, and whoever else you want to play with online. The code receiver simply has to input your Friend Code on their Nintendo Switch to add you as a friend.
Your “Play Activity” is shown beneath your Friend Code. Your Play Activity shows software played by the user profile along with an estimated play time for each title. Up to 20 titles will be displayed.
You can also change who can see your play history, and even clear your Play Activity completely, by navigating to the “User Settings” tab to the left of the screen on the “User Page”.
Play Activity can take awhile to appear, and play time usually takes a bit longer.
Play time is also a bit vague at first and then becomes more specific. Here are playtime descriptors you should expect to see in the first few hours of playing a title:
First played “X” minutes ago (where X is the amount of time that has passed since you played the game)
- “Played for a little while” (playtime between 1 minute and 59 minutes)
- “Played for 1 hour or more” (playtime between 60 minutes and 119 minutes)
- “Played for 2 hours or more” (playtime between 120 minutes and 179 minutes)
- “Played for 3 hours or more” (playtime between 180 minutes and 239 minutes)
Furthermore, if you select a game from your Play Activity list and press the A button, a menu will pop-up asking if you would like to start the software. If it is a physical game and you don’t have the game inserted, you will be prompted to insert the game card.
I’ve always enjoyed looking over my Play Activity and being surprised at how many hours I put into a game (over 200 for The Legend of Zelda: Breath of the Wild alone; wow!) or being genuinely surprised at how little I played a game when I thought I played for a lot longer (I only played the rhythm game VOEZ for 5 hours?!?! It felt like more!).
Playtime is a fun metric to share with friends and to show friends how much fun you are having with a game.
Friend List
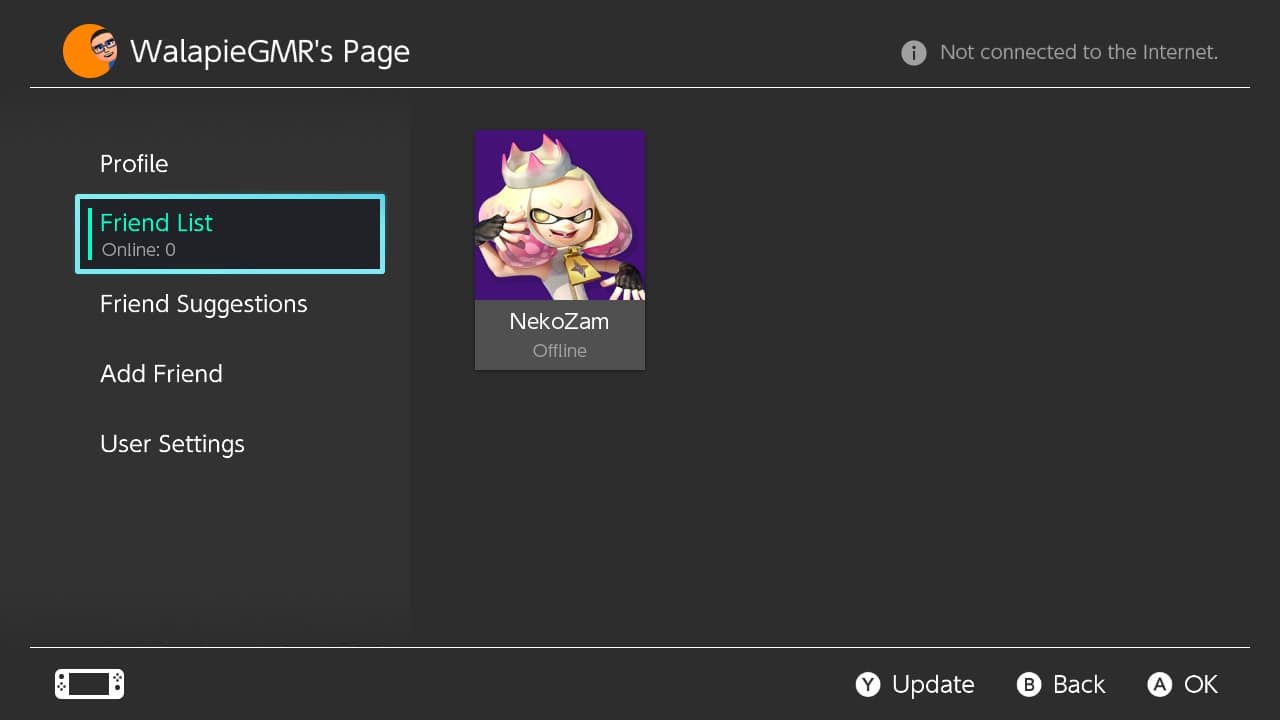
You are able to view a list of your Nintendo Switch friends. You can view the profile pictures and Nicknames of your friends along with the last time your friends were online. You can also view the online status of your friends and whether each one is connected to the internet along with what game he or she is playing.
You can press the Y button to update and refresh your friend list. Your friends are organized to the right of the screen (from left to right, row by row) in order of the most recent to connect online to the least recent. If you want to see if a friend has come online, press the Y button to update the list. This will change the online status of your friends that recently connected or disconnected from the Internet. Your friend’s online status is viewable below their profile picture.
You can view your friend’s user profile page. Selecting a friend’s profile and pressing the A button will bring you to that friend’s user page. A friend’s user page is different than your user page.
On a friend’s user page, you will see their profile picture and name to the left along with a Star button next to “Best Friends” and an “Options” button.
- Best Friends button: The Best Friends button allows you to mark a friend as a “best friend”. A star icon will appear at the top left of your friend’s profile image after designating a best friend. That friend will now be placed at the front of your friend’s list regardless of when the last time they connected online. You can toggle a friend’s Best Friend status on and off whenever you see fit by selecting the Best Friend button then pressing “A” on your controller.
- Options button: Selecting the Options button will bring up a pop-up menu that allows you to Remove Friend or Block Friend. Trust me, you might not think you will need this feature right now, but removing/blocking friends is handy when you need it the most.
You can view your friend’s Play Activity. A list of games your friend has recently played, up to 20, is viewable to the right of the screen. You can select games from it with the click of the A button just like you could from your own Play Activity.
- If you own the game you clicked on from your friend’s Play Activity, a pop-up menu will appear asking you if you want to play the game.
- If you don’t own the game you clicked from your friend’s Play Activity, a pop-up menu will appear asking if you want to head to the Nintendo Switch eShop to check out more information about the title.
- Either way, you can back out of the pop-up menu and return to your friend’s profile with a press of the B button.
I love looking at my friends’ Play Activity lists to check out great games I might have missed. It has helped me become aware of hidden gems available on Nintendo Switch.
You can view how you became friends. Below your friend’s Play Activity, the method you became friends with your Nintendo Switch friend is stated along with when you became friends (date and time).
This is a cool way to re-live nostalgic memories. I have Nintendo Switch friends that I made in 2012 by migrating my Nintendo Wii U Friend List over. That’s crazy cool to know and look at fondly.
Friend Suggestions
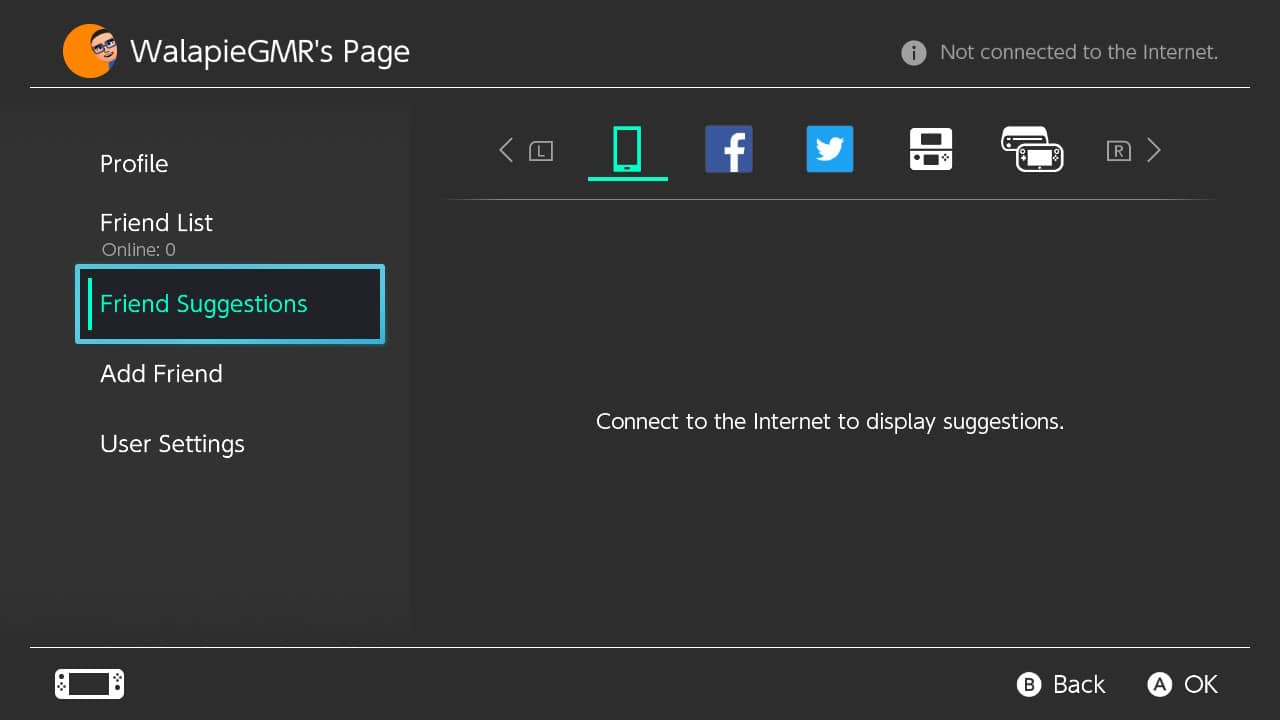
The Nintendo Switch has various ways at suggesting friends. You will find all of these suggestions in the Friend Suggestions category of the Nintendo Switch User Page.
Suggestion methods will be shown as icons at the top of the screen. There are 5 icons and methods: Smartphone app, Facebook, Twitter, Nintendo 3DS friends, and Wii U friends. These are the ways the Nintendo Switch will suggest friends to you.
- If you play Nintendo smart-device games such as Super Mario Run and have friends in that app, your friends will appear here as well.
- You can Link a Facebook account and Twitter account here, allowing you to add your social media friends as Nintendo Switch friends.
- Because I attached my Nintendo 3DS and Nintendo Wii U to my Nintendo Account, my 3DS and Wii U friends that owned a Nintendo Switch were suggested to me. It’s that simple.
There are multitudes of ways to add friends to your Nintendo Switch account so try them all. I have used many of the methods listed above and can vouch for their ease of use and efficiency.
Add Friends
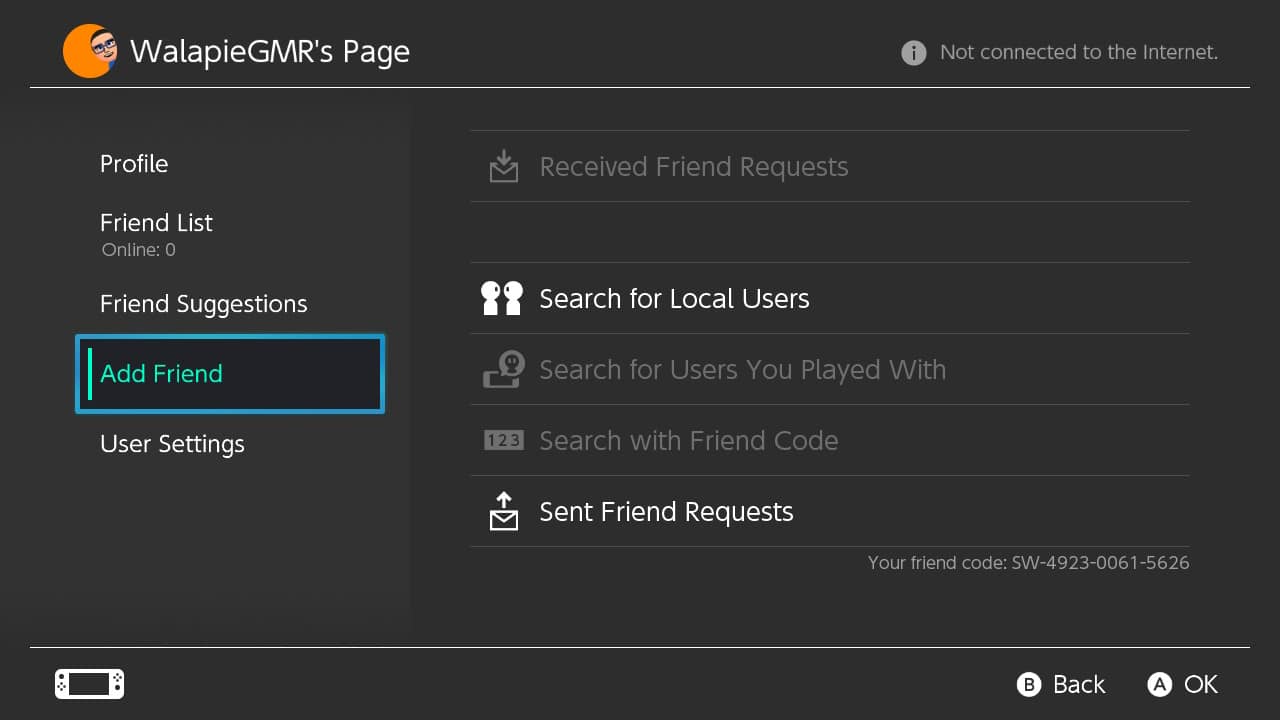
The cool thing about Nintendo Switch is that adding friends to your friend list is made really simple.
The Add Friends section of the user page has 5 different features.
Received Friend Requests. If someone sent you a friend request, you can view it here.
Search for Local Users. You can also search for local users who are nearby, playing a Nintendo Switch.
Search for Users You Played With. If you played with a person online or nearby, you can add them by using this feature.
Search with Friend Code. You can enter a player’s Nintendo Switch Friend Code to directly send a friend request to a specific player. Think of the Friend Code search feature as entering someone’s telephone number.
Sent Friend Requests. Finally, you can also look at any Friend Requests you have sent out that are still pending.
I have used the Nintendo Switch Add Friends settings to add many friends to my Friend List and have found it painless to do so.
I find searching for Friend Codes is the quickest way to add someone you know, such as a friend or relative, while searching for players you played with is even faster since it does not require an exchange of Friend Codes (this method is also good for adding people you met online).
Whatever method you choose to add friends, the Nintendo Switch has you pretty much covered.
User Settings
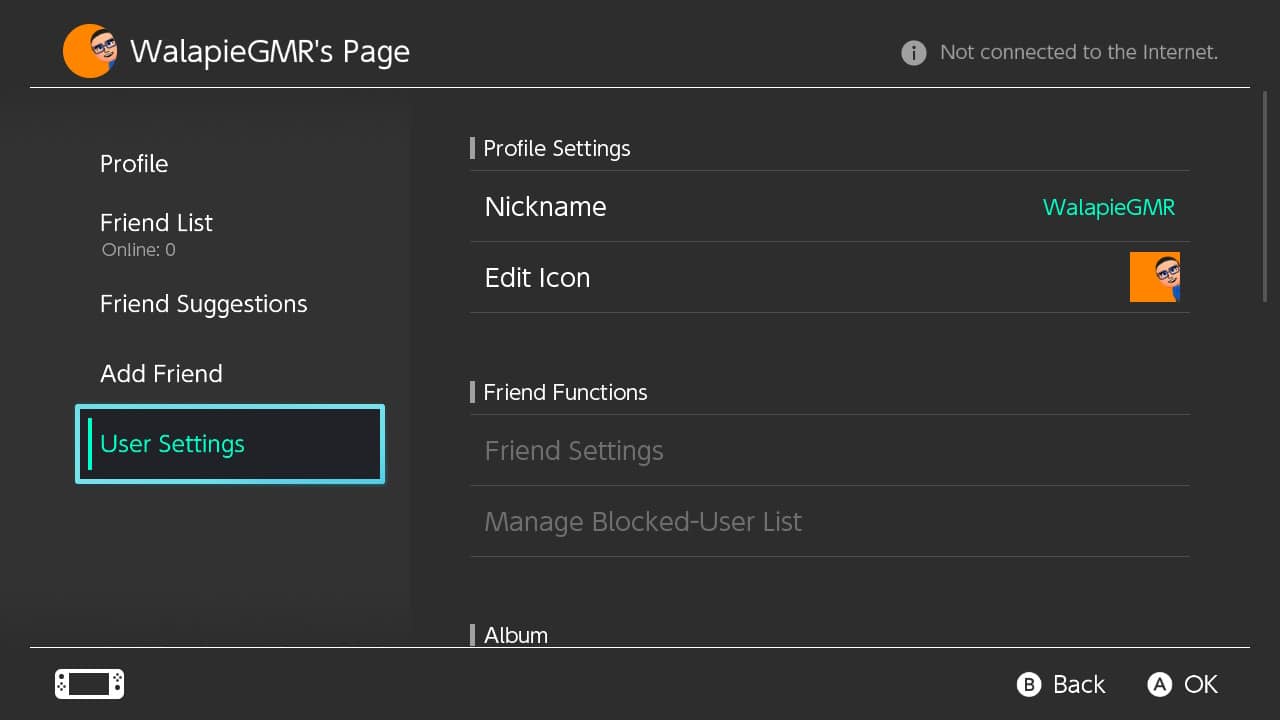
You can personalize your Nintendo Switch user profile a lot just by visiting the User Settings tab.
In this menu, you can edit
- Profile settings
- Friend functions
- Album settings
- View Nintendo Switch Online subscriptions
- Check your Nintendo eShop settings
- Update download progress
- And view a number for customer support
Profile Settings
The Profile Settings allows you to edit your Nickname (this is your Nintendo Switch profile name friends and players online will be able to see) and your profile Icon (your profile image which is also viewable by friends and players online).
-Nickname: You can create and edit a nickname for your user.
- Your user name can’t be offensive and can be up to 10 characters long. A pop-up keyboard will appear on screen for you to enter your user nickname.
- A quick suggestion for picking your Nickname: I recommend not making it your full name, anything that includes sensitive information, and anything offensive. This way, you can keep yourself safe and secure.
- Want to change your Nickname? Don’t worry if you misspelled your name, outgrew your nickname, or you simply want to change your profile name. Just because. You can change your Nickname at anytime, a useful feature I have used multiple times on my primary Nintendo Switch account.
-Edit Icon: This is where you can edit or change your profile image icon. You will be able to change the background color and image.
- There are over 60 background colors variations available covering a variety of popular colors from pinks, reds, and greens, to blues, purples, and black. This can also be changed at any time to your liking.
- Additionally, there are over 100 profile images to choose from including characters and icons from various Nintendo Games. This icon list does get updated so check back often.
- You can also use Mii characters (cartoon characters made popular with the Nintendo Wii and still used on the Nintendo Switch) as your profile image. You can change your Mii character’s pose and facial expressions to create wacky and humorous Profile Icon images—my Mii is lying down in a relaxed position with his head propped up by his hand. There are over a dozen facial expressions and 20 plus poses to choose from. Go ahead and create the Mii Profile Icon of your dreams.
Friend Functions:
The Nintendo Switch Friend Function tab allows you to change Friend Settings and to Manage Blocked-User List.
- Friend Settings
Display online status to—
You can pick what friends will see your online status. This tells other players if you are Online or Offline.
You can choose 3 settings as display options for your online status:
- All Friends. All Friends will be able to see your online status.
- Best Friends. Just friends you selected to be your Best Friends will be able to see your online status.
- No One. No One will be able to see your online status.
Keep one thing in mind: Friends who can’t see your online status may not be able to play online with you. You can edit this setting at anytime if you ever change your mind.
Display Play Activity to—
This setting allows you to moderate who gets to view the games that you played listed in your Play Activity section in your User Profile.
You have 4 options to choose from:
- All users. Anyone will be able to view your Play Activity.
- Only friends on your friend list will be able to view your Play Activity.
- Best Friends. Only Friends you designated as Best Friends will be able to view your Play Activity.
- No One. No one will be able to view your Play Activity (other than yourself, of course).
Again, choose what is best for you for now as this setting can also be changed at any time you desire.
Receive Friend Requests—
If you rather not receive Friend requests at all, from friends or strangers, you can choose to turn On/Off this feature here at anytime.
Friend Notification Settings—
The Nintendo Switch allows you to adjust settings regarding on-screen Friend Notifications.
These Notifications will appear on screen during your play session. If you are like me and you don’t want your play session interrupted by on-screen notifications, you can turn them Off here. You can turn these notifications On at anytime if you change your mind.
Keep one thing in mind: You will only receive friend notifications when you are online.
The following is a list of Nintendo Switch Friend notification settings you will find:
- Friend-Request Notification. An on-screen notification will appear when you get a Friend Request. You can turn this On or Off.
- Online Users. An on-screen notification will appear when one of your friends go Online.
Notify When Friends Go Online Settings:
- All Friends. An on-screen notification will appear when any of your friends go Online.
- Best friends only. An on-screen notification will appear when friends you designated as your Best Friends go Online.
- You will not be notified when any friend goes Online.
If you set your Online User notifications to All Friends or Best Friends only, you will only be notified if a specific friend comes online once within a 30 minute period. Friends that go Online then Offline multiple times within a 30 minute period will only be shown once, limiting on-screen notifications.
- Voice-Chat Notifications. An on-screen notification will appear when you receive an invitation to voice chat via the Nintendo Switch Online smart device app or if an online user invites you to voice chat. You can turn this On or Off.
Unlink Social Media Account and Friend Suggestions—
You can unlink Facebook and Twitter social media accounts and clear Friend Suggestions populated from those social media accounts under this setting.
Delete Play Activity—
You can delete the games listed on your Play Activity here.
Reissue Friend Code—
You can change your Friend Code here. You may want to do this if your Friend Code was made public and a lot of strangers are trying to Friend request you.
Keep in mind that this will change your friend code too. So, make sure you give friends and family your new Friend Code, not your old one.
- Manage Blocked-User List
This is where you will manage Friends and users you have Blocked. You can add and/or remove people from this list.
- Blocked friends are automatically removed from your friend list.
- Blocked users cannot send you friend requests and you will not be able to play with them online. Some games and game modes may still allow you to play with blocked users depending on the game.
Managing your blocked-user list is a great way to deal with anyone you feel uncomfortable playing with or users you feel are harassing you.
Album:
Posting to Social Media. The Nintendo Switch allows users to take screenshots and short video clips and post them onto Facebook and Twitter.
In the Album settings of your User Profile, you are able to link and unlink Facebook and Twitter social media accounts that you have designated to accept Album screenshot and video posts from your Nintendo Switch.
Nintendo Switch Online:
Here, you will be able to look up information regarding your Nintendo Switch Online account.
Check Your Subscriptions. Clicking this button will take you to the Nintendo eShop online store as long as you are connected to the internet. Once there, you will land on your Nintendo Switch Online subscription page.
Information you will be able to view includes your subscription expiration date and the type of subscription plan you have.
Nintendo eShop-
Here, you will be able to look up information regarding your Nintendo eShop account details.
Nintendo eShop Settings. Clicking this button will take you to the Nintendo eShop online store as long as you are connected to the internet. Once there your will land on your Nintendo Account page.
You will be able to view information regarding your payment methods, re-downloadable games and software, and much more.
Update Download Progress—
If your game and software downloads won’t finish downloading or if they ever get stuck while downloading, you should go to the Update Download Progress settings first.
Simply click on the “Update Download Progress” button to automatically update the download progress of you games and software. This will force downloads to resume progress and finish downloading to your Nintendo Switch.
This feature has come in handy for me many times. I often update all of my games in one sitting (Nintendo Switch games such as Fortnite, Minecraft, and Paladins update quite often) and this can cause my game updates to freeze.
This can happen if multiple downloads are trying to all update at once. But, visiting the Update Download Progress setting and updating my game downloads has always helped me out of this jam.
Link Nintendo Account. This section allows you to view a partial view of the email linked to your Nintendo Account. Most of it is hidden for security reasons. This section also reminds users that “You can configure your Nintendo Account using a smart device or PC (accounts.nintendo.com)”.
Number for Customer Support—
And finally, the User Profile section ends with a number you may have to provide to Nintendo Customer Support if you ever need assistance. Make sure to take a screenshot or picture of this image and write it down just in case.
This ends the User Profile settings of your Nintendo Switch. There are so many features and settings you can personalize to your satisfaction, it’s really amazing.
I highly recommend for you to at least look through all of these features just to know what your Nintendo Switch can do. I know I learned a lot just by perusing through the menus at a leisurely pace and I know you will too.
Learn How to Turn The Nintendo Switch System Off
It would not be right to end Part 1 of this guide without teaching you how to turn off the Nintendo Switch. So, let’s get right to it.
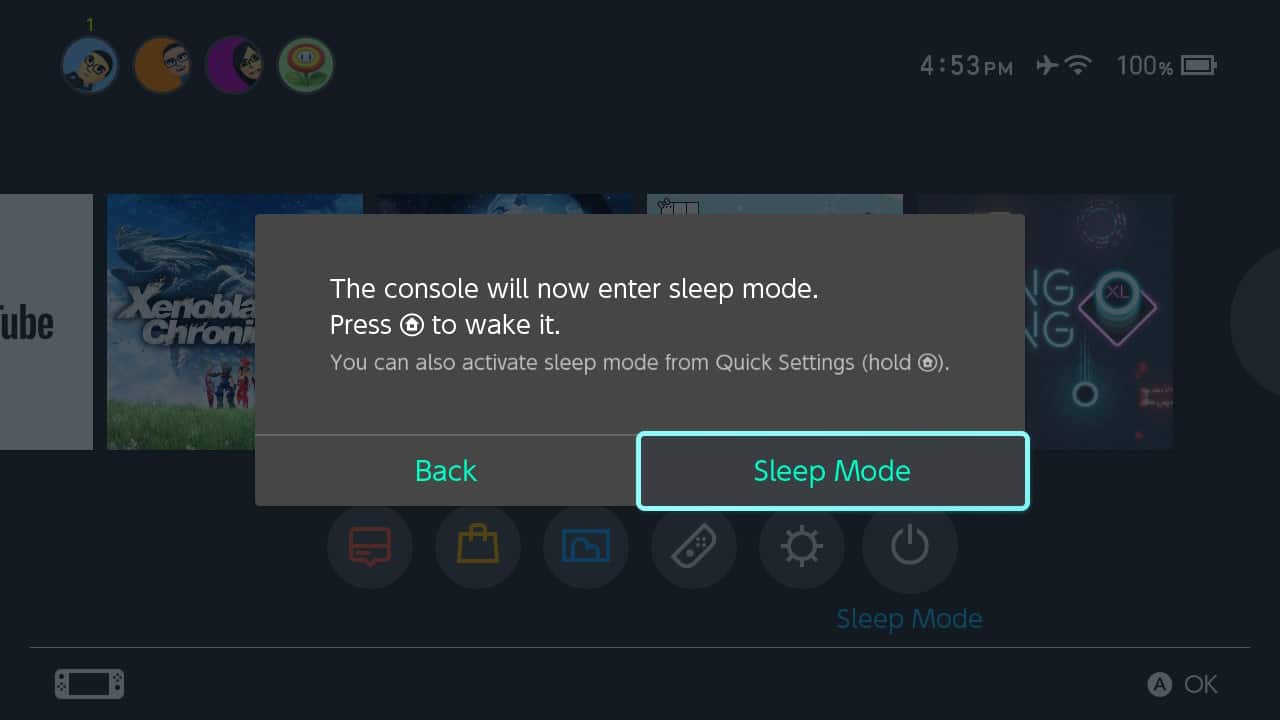
Press and hold the power button on the top of the Nintendo Switch until an on-screen menu appears, prompting you with 2 options: Sleep Mode or Power Options.
- Selecting Sleep Mode will turn off your Nintendo Switch but not completely. Your Nintendo Switch will still remain on but in a low-power state with the screen turned off and the buttons locked to prevent accidental inputs.
- Selecting Power Options will open up a new menu with 2 additional options: Restart and Turn Off. Choosing either one will shut down any game you are currently playing. Keep this in mind and make sure you save your game before choosing to Restart or Turn Off your Nintendo Switch system.
- Not selecting anything at the Sleep Mode, Power Options screen after a couple of minutes will automatically put your Nintendo Switch to sleep.
I always remember to shut my Nintendo Switch off if I know I am not going to be playing the system for a couple of days. Otherwise, Sleep Mode works just fine to hop in and hop out of Nintendo Switch games on the fly.
Use either method of shutting off your Nintendo Switch to your liking.
See You In How to Use Nintendo Switch Part 2!
Now that you finished Part 1 of How to Use Nintendo Switch, head over to Part 2 of this tutorial and learn about 6 powerful, FREE Nintendo Switch apps included with the hardware.
We will be jumping back to the home menu and exploring each in-depth. You won’t want to miss this Nintendo Switch guide.
I’ll be waiting for you, Nintendo Switch enthusiast.
Can’t wait to see your there!
By Wally
(Screenshots taken by me. Images sourced from product pages on the Nintendo website. Logos, characters, and images are owned by their respective owners)