Using Nintendo Switch can sometimes be confusing—I wish I had a helpful how-to guide when I bought my Nintendo Switch in early 2017.
That is why I created this handy, detailed, yet beginner friendly, Nintendo Switch tutorial just for you.
Who is this Guide For?
If you already read this introduction in How to Use Your Nintendo Switch Part 1 (which I highly recommend you do for important Nintendo Switch details and to better understand this guide), then skip to 6 Important Nintendo Switch Apps section.
Part 1 and Part 2 of this Nintendo Switch guide will teach you how to use your Nintendo Switch system feature by feature, menu by menu.
This guide will help you understand what your Nintendo Switch can do way more than you understood before. Specifically, this part of the two-part guide will focus on the 6 Nintendo Switch apps that come pre-installed on your Nintendo Switch for FREE.
Yes. For free.
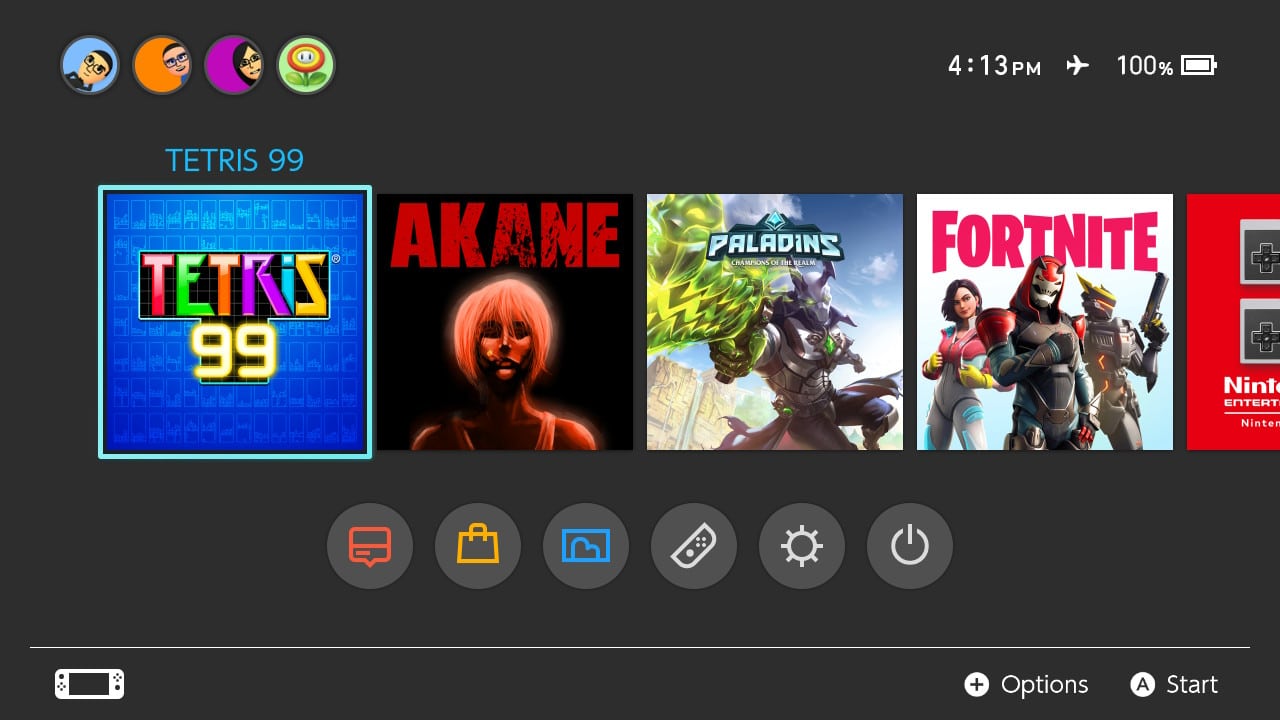
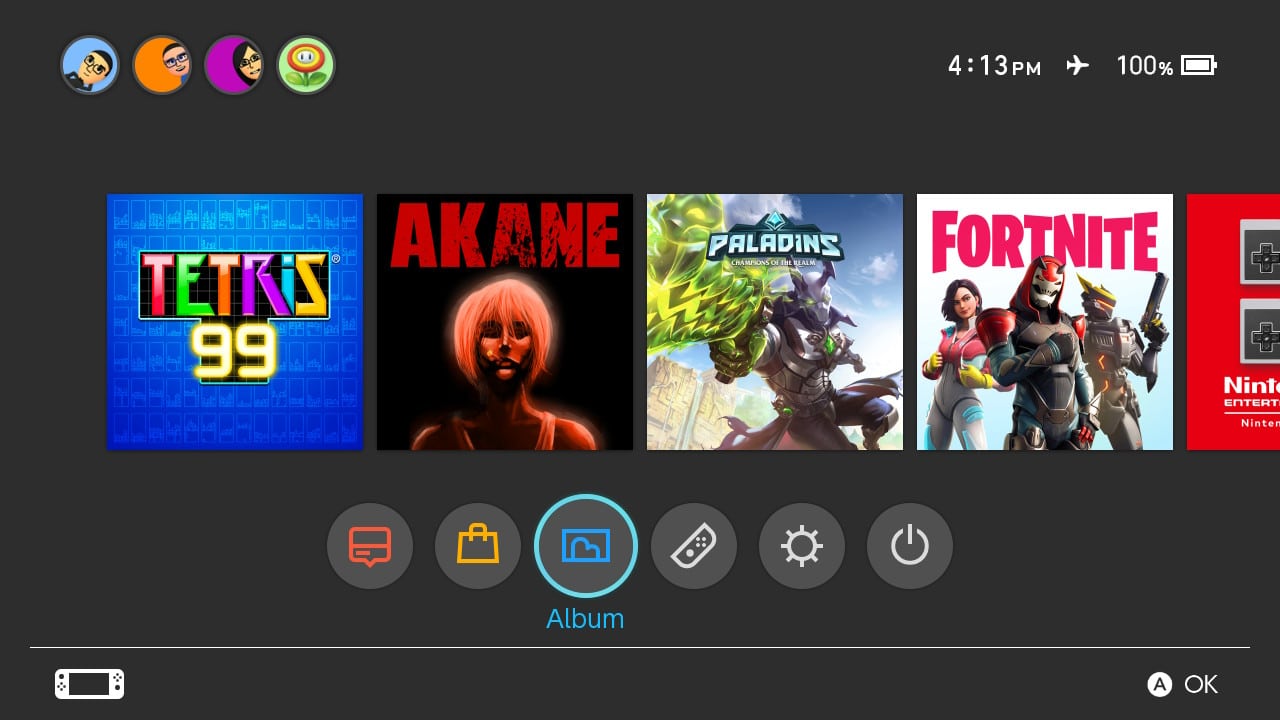
The menu icons at the bottom of the screen are shortcuts that take you to a dedicated page so you can use whatever feature you selected.
For example, the “Album” icon at the bottom of the Nintendo Switch home screen will take you to a dedicated page all about viewing, managing, deleting, and editing your Nintendo Switch screenshots and videos.
These 6 circular icons on the Nintendo Switch home screen are separate Nintendo Switch apps that allow you to execute cool and powerful things.
Being knowledgeable of the Nintendo Switch “apps” will allow you to get the most value and use from your Nintendo Switch console. I know I am able to better navigate through the Nintendo Switch, find functions quicker than ever before, and know just where to go ever since I educated myself on everything the Nintendo Switch can do.
I hope you enjoy this Nintendo Switch tutorial as much as I had putting it together for you. Feel free to bookmark this page if you find it useful, share, and come back to it whenever you feel the need.
Your friend,
Walapie Gamer
Contents
PART 1: The Nintendo Switch Home Screen explained
PART 1: Navigating the Nintendo Switch Home Screen
PART 1: Learn about Nintendo Switch User Profiles
PART 1: Learn how to turn the Nintendo Switch off
-Read How to use your Nintendo Switch Part 1 Now-
IN THIS GUIDE:
6 Important Nintendo Switch Apps
Learn about Nintendo Switch News Menu
Learn about Nintendo Switch Nintendo eShop Menu
Learn about Nintendo Switch Album Menu
Learn about Nintendo Switch Controllers Menu
Learn about Nintendo Switch System Settings Menu
Learn about Nintendo Switch Sleep Mode Menu
If you want to learn about the important steps to getting your Nintendo Switch charged, turned on, user profiles and with a complete walkthrough of the home menu (a must-read for all Nintendo Switch enthusiasts), head to How to Use Your Nintendo Switch Part 1.
In part one of this Nintendo Switch guide, we covered everything that can be found by looking at the Nintendo Switch home screen from top to bottom. From user profiles, to the game carousel, and the below, the home screen is where your Nintendo Switch journey begins.
6 Important Nintendo Switch Apps
In this guide, we will go over the six very important icons located at the bottom of the Nintendo Switch home screen: News, Nintendo eShop, Album, Controllers, System Settings, and Sleep Mode from left to right.
These applications let you do really cool and powerful things with your Nintendo Switch console. Let’s jump in!
Learn about Nintendo Switch News Menu
1) News Menu App
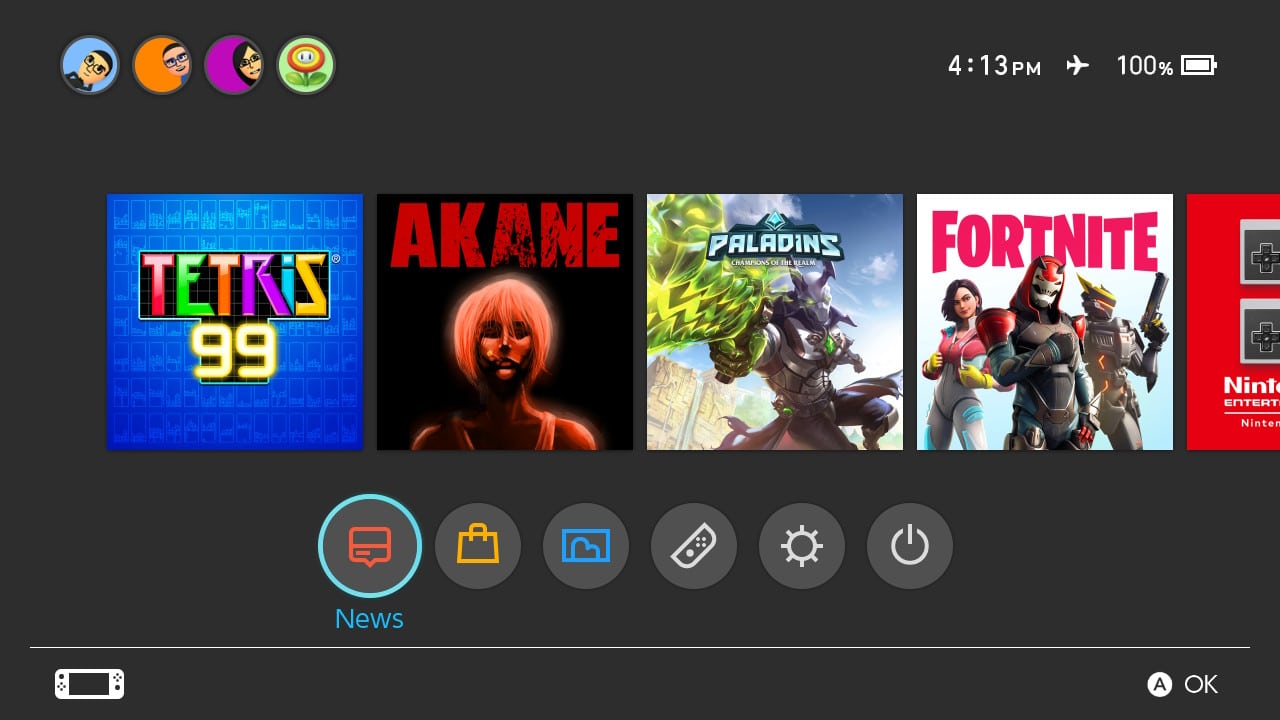
The Nintendo Switch news application is a really cool way to stay up-to-date with the latest Nintendo headlines.
By clicking on the app button on your Nintendo Switch home menu, you will be taken to a News feed with all the latest news, tips, and updates from Nintendo and other game channels you follow.
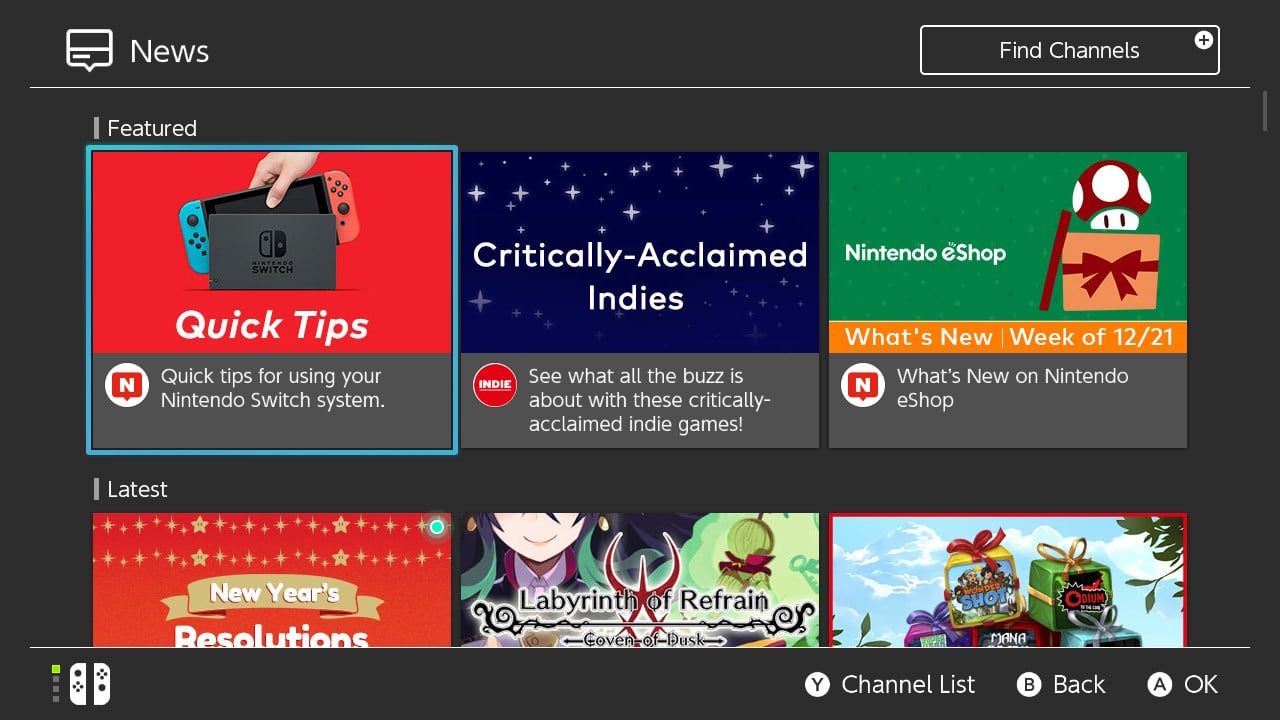
The Nintendo Switch News area is grouped in two parts:
- Featured
- Latest
Featured news is shown first and is usually just a handful of headlines from the game channels you follow, while Latest news rests below the Featured news area and contains the rest of the news headlines from the game channels you follow.
Haven’t followed a Nintendo Switch News channel yet?
Following channels is free and easy to do which I cover in the Find Channels sub-section coming up very shortly. Once you followed a game’s channel, news regarding that game will start appearing in your news feed.
You can truly curate the right news just for you, remaining informed of breaking news and helpful hints from the games you care about.
Pro tip: at the very least, follow all the games that you own.
I follow all games I purchase in order to get information straight from the developers I might not get anywhere else. Doing this helps me stay informed on deals, sales, and any upcoming events.
That’s why I check the Nintendo News app every day or so and I always find something great.
Now, let’s navigate the News screen.
-Find Channels
You will find a long rectangle with the words “Find Channels” next to the + button at the top right of the News screen.
Clicking on this will take you to a list of all available news channels.
The available channels are split into two sections:
- New Channels
- Channels (most recently updated)
You can follow any channel on this list. As explained above, by following a channel, you will receive news from that channel in your news feed.
How to follow a channel:
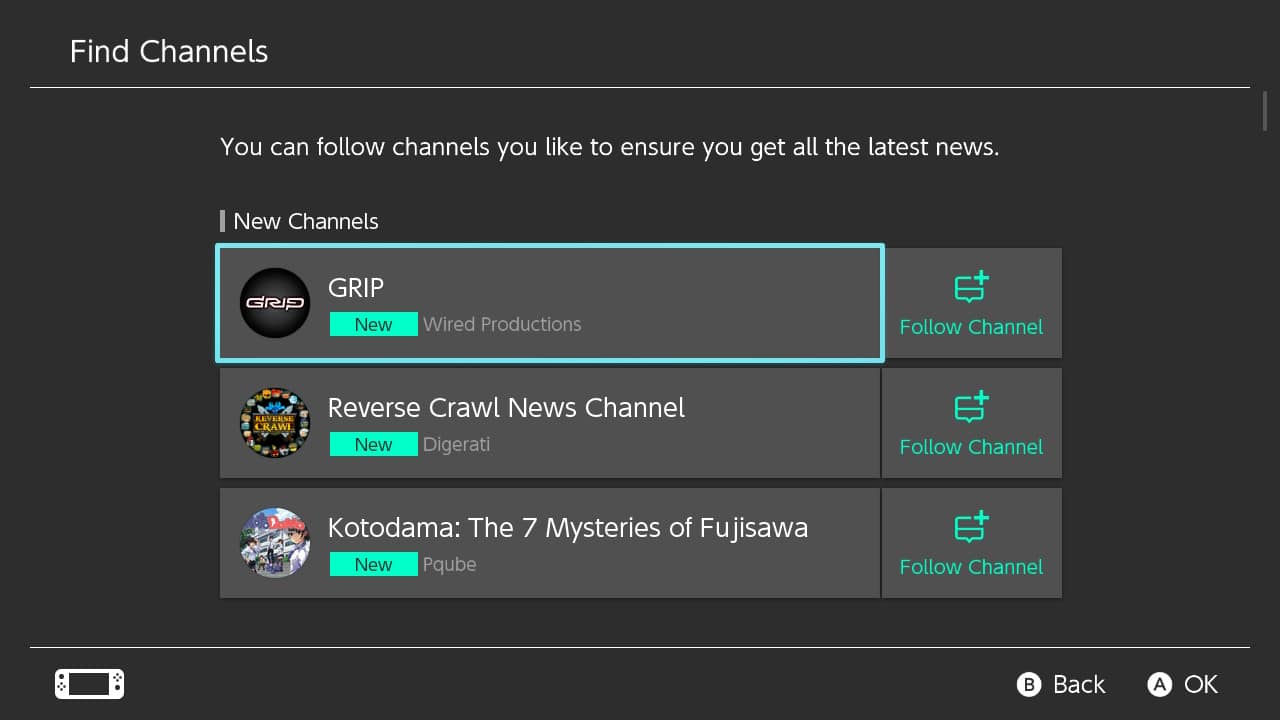
- Find a game you want to follow by scrolling down the list with the analog stick or directional buttons on the Left side of your controller.
- Highlight the smaller button to the right that says “Follow Channel”
- Press the A button.
- A jingle will play and the “Follow Channel” button will now be gray and read “Following” afterward.
- You are now following a new channel. Congratulations!
In order to unfollow a channel, perform these exact same steps to receive an onscreen confirmation that you have unfollowed it. You will no longer receive news from any channels you unfollow.
Unfollowed a channel by mistake? No worries. You can re-follow a channel at any time.
-Your Channel List
You can leave the Find Channels menu and return to the Nintendo Switch news feed by pressing the B button.
Once there, we will now delve into your Channel List menu. Enter your Channel List menu by pressing the Y button.
This screen is broken up into two parts:
- Left of the screen: a list of all the channels you follow
- Right of the screen: your selected news channel news headlines
You will find “Unread Articles” at the very top of the channels you follow on the left side of the screen. A green dot will appear next to Unread Articles if you have an article you have yet to read.
A list of all of the channels you follow rest directly below the Unread Articles section. A green dot will appear next to any game channel with an article you have yet to read.
Pressing the A button on a channel or pressing the Right directional button located on the left side of you controller will navigate your cursor to the right side of the screen.
The right side of the screen shows off headlines pertaining to the selected channel. Here you will find square new thumbnails containing an image and a short sentence headline.
Navigate and select any headline that piques your interest by using the analog sticks or the directional buttons then press the A button. You will immediately be taken to the news article you selected.
Inside the news article, you will find a bevy of information pertaining to that headline and the game itself including
- what the article is about
- the game’s name and the game’s publisher
- a short description of the news
- the game’s rating
- and a like feature at the bottom of the article allowing you to show your love or hate for the headline.
Some news articles even have a “Related Products” section to the top right of the screen. A thumbnail image and the name of the game will appear here. Once clicked on, you will be given the option to be taken straight to the game’s product page on the Nintendo eShop to view details about the game or to purchase it if you choose.
This is a nifty feature for any game you haven’t purchased yet but are looking to snag in the future. I use the Related Products feature whenever a game I haven’t purchased yet is having a sale or is discounted on the Nintendo eShop.
Nintendo Switch’s News application is a great way to learn more about games you don’t own and to stay informed on the games you do. Every Nintendo Switch owner will be doing themselves a service by frequently using this app.
Now, press the home button on the right side of your controller to return to the Nintendo Home Screen.
Learn about Nintendo Switch Nintendo eShop Menu
2) Nintendo eShop App
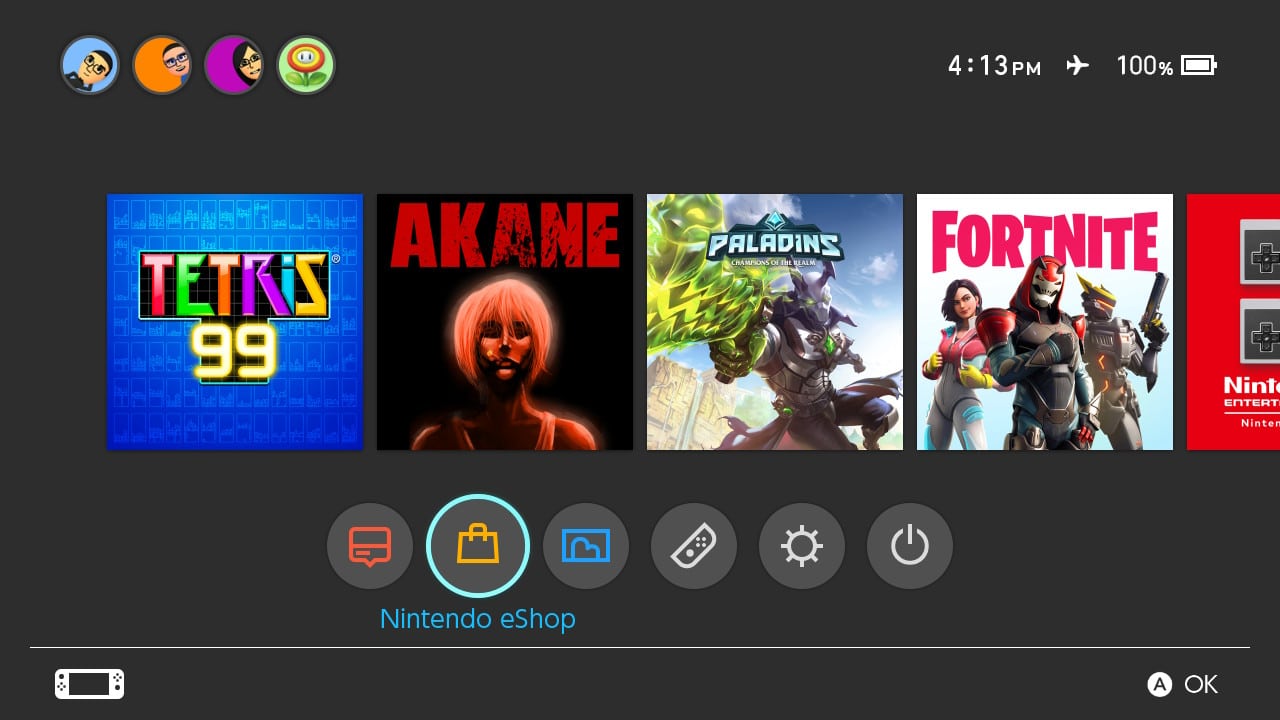
The Nintendo eShop app is the second button from the left located at the bottom of the Nintendo Switch Home Screen.
This is a powerful application that allows you to open a lot of your Nintendo Switch’s gaming potential.
By using the Nintendo eShop app, you will be able to
- Purchase digital games
- View your Nintendo Account details
- View digital game sales
- See the latest releases
- Stay up-to-date on digital only games
- Purchase a Nintendo Switch Online membership
- Learn detailed information about every single title
- Download free apps such as YouTube
- Download free games such as Fortnite, Warframe, and Paladins
- Add funds to your account
- Re-download games you may have deleted
- And so much more!!!
This app is truly powerful, allowing you gain so much more from your hybrid home-handheld console. Keep in mind that using the Nintendo eShop app requires a stable internet connection.
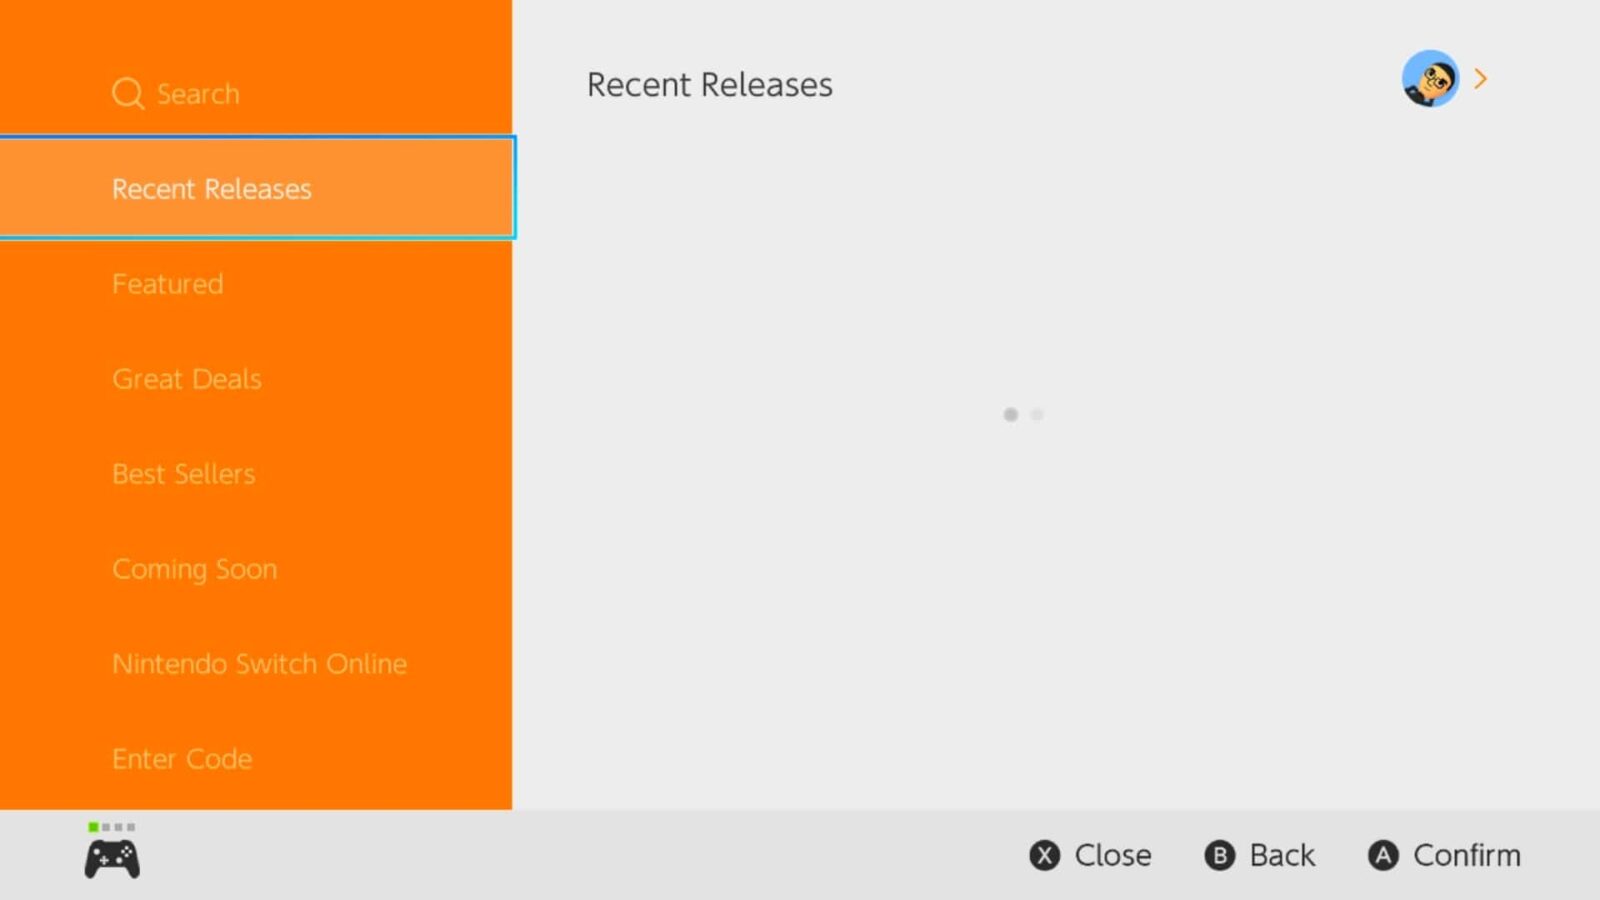
Clicking on the application with the A button will bring up an on-screen display of all of the Nintendo Switch profiles that you have on your Nintendo Switch.
Choose the profile you want to enter the Nintendo Switch eShop as and press A.
If you are connected to the internet, an orange screen will appear and the Nintendo eShop will load shortly. You are officially on the Nintendo eShop. Yay!
You can now peruse the thousands of available Nintendo eShop games available for download at your leisure.
Want to know more about the Nintendo Switch eShop? I mean, a lot more? The Nintendo eShop has so much information it needed its own helpful guide. Luckily, I put together Everything You Need to Know About the Nintendo Switch eShop App just for you (coming soon).
Now, let us move on to the next application.
Learn about Nintendo Switch Album Menu
3) Nintendo Switch Album App
The Nintendo Switch Album application is located at the bottom of the Nintendo Switch Home screen and is third from the left.
The Album hosts all of the screenshots and videos you have taken along with all of the screenshots and videos you have edited. I love images and video clips so much, I use the Nintendo Switch’s Album application at the end of almost every play session to check out the cool media I snapped during gameplay.
It’s not uncommon for me to have 1,000 pictures and video clips or more in my Album app at any given time. Yes, over 1,000 media files!
Like I said, I really love this handy feature and you will, too, if you love taking pictures and video clips just as much as I do.
Why do I and so many others out there enjoy taking tons of pictures and video clips? Well, you will need to know what screenshots and video clips are good for.
Screenshots and video clips are good for
- Reminding yourself of a cool gaming moment you had like a high score or a win
- Showing your friends and family your proudest and funniest moments
- Creating a chronologic series of events for your Nintendo Switch
- Having in-game manuals, tips, or secrets immediately at your disposal so just in case you want to look them up later
- Posting to Twitter and Facebook to share with our online communities among other things.
Now that you know what the Nintendo Switch Album is and what it is good for, it is time to jump into the details and navigate the different Album menus.
-Album main screen
You will find everything you need to interact with your Nintendo Switch media on the Album’s main screen.
All of the screenshots and video clips you have taken will use up the center—and majority—of the screen. Your media will appear row after row if you have a lot like I do.
You can navigate your content by scrolling down if you are at the top or by scrolling up if you are at the bottom. Holding down or up will make the scrolling go much faster.
The top right of the screen displays “All Screenshots and Videos (000)”.
This is a total count of every file inside of your Album. If you have 286 pieces of content in your Album, the number next to All Screenshots and Videos will read (286).
Just look at the top right of the Album screen to find out just how many files are inside of your Album.
How to Filter Your Nintendo Switch Album
But what if you only want to see video clips? Or perhaps you only want to see the images you took? And what if you only want to see the hundreds of pictures you took of Pikachu in a certain Pokemon game? The filter feature can do all of this and more.
Press the Y button when you are on the main Album screen. If you ever forget what a certain button does, check the bottom right of the screen for what each button does at any given time.
Pressing the Filter button will open the Filter menu. I created a list of the Filter options for your use:
- All Screenshots and Videos: Selecting this filter will show you screenshots and videos from all games located in System Memory and on your microSD memory card.
- Screenshots Only: Selecting this filter will show you screenshots only from all games located in System Memory and on your microSD memory card.
- Videos Only: Selecting this filter will show you videos only from all games located in System Memory and on your microSD memory card.
- System Memory: Selecting this filter will show you screenshots and videos from all games located only in System Memory
- microSD Card (this is the Nintendo Switch’s external memory card): Selecting this filter will show you screenshots and videos from all games located only on your microSD memory card.
You can choose to Filter your Album content by one of these filter options at a time. And each Filter will tell you the total amount of screenshots and/or videos that will be filtered down to as a number in parenthesis next to the filter option.
For example, if you have 5 videos and filter by Videos Only, (5) will appear next to the Videos Only option. This is a very quick way to see just how many videos or screenshots you have. Remember to check this screen if you ever need to know.
A green circle with a black check mark will appear to the right of the option once it is selected to help you know which filter option you currently have in use.
You can also filter by any game of which you have a screenshot or video.
The list of games will automatically populate below the Filter choices I listed. The number of Album content you have per game will appear as a number inside parenthesis next to the game title.
The Filter option is a powerful tool that provides useful image and video information while allowing you to find just the content you are looking for.
How to Delete Nintendo Switch Album Content
You can delete any image or video clip you have on your Nintendo Switch.
You may want to delete Nintendo Switch Album content because
- You want to free up space
- You don’t want the picture or video clip anymore
- You accidently took a picture or video clip
- You created an edited version and you no longer need the original
Rest assured that whatever your reason, you can delete your screenshots or video clips easily in just a few steps.
- Navigate to the image or video clip you want to delete with the analog sticks or directional buttons on your controller.
- Press the A button to select that media file. The media file should become fullscreen.
- Now, press the X button to delete the file.
- A message will appear on-screen to confirm your deletion with the options of either Cancel or Delete.
- Choose Delete to get rid of your file for good (or Cancel if you came here by mistake).
- Success!
See, told you it was easy.
But, what if you wanted to delete more than one media file at a time?
If you remember, I often have a combination of over 1,000 screenshots and video clips on my Nintendo Switch at a given time. And I find myself needing to delete media files often because I take so many of them.
I am happy to say the Nintendo Switch allows for bulk deletion of up to 100 media files at a time. This is a much faster way to delete your content than deleting each file one by one.
How to Delete Multiple Nintendo Switch Images/Videos At Once:
Deleting multiple Nintendo Switch images or video clips is just about as easy as deleting a single Nintendo Switch media file but with a few extra steps.
- Make sure you are at the main Album screen.
- Press the X button. The screen should zoom out, the message “Select screenshots and/or videos to delete” should appear at the top left of the screen, and information regarding how much space your content is taking up should appear at the right of the screen.
EXTRA: You can also expand an image to fullscreen at this point by using the “Expand for Review” feature. Highlight an image you want to review fullscreen and then press the + or – button.
Tada! Your image will appear fullscreen. When your image is fullscreen, press the + or – button to toggle the help bar at the bottom of the screen on and off, press the B button to return to the “Select screenshots and/or videos to delete” step, or press the A button to select the file.
Selecting the file will cause a large green circle with a black check mark to appear at the top right of the screen. This signifies that your media has now been selected for deletion. Remove the selection by pressing the A button once more.
- Navigate to, then press the A button on each image or video you want to delete. A green circle with a black check mark will appear at the top right corner of any media file you have selected for deletion.
- Now, navigate to the large Delete button at the bottom right of the screen. Press A.
EXTRA: The easiest way to navigate to the Delete button? Press the Right directional button or right on your analog stick until you reach the farthest right image or video clip. Then, press right just once more and the cursor will automatically jump to and highlight the Delete button.
- A message will appear with the option Cancel and Delete.
- Press the A button on Delete to get rid of your files (or Cancel if you made it here by accident).
- Success!
You can also backup your Nintendo Switch media files instead of deleting them if you rather do that. But that requires a little more equipment and a computer. If you are interested in backing up your Nintendo Switch content, I created a guide explaining How to Transfer Photos from Nintendo Switch to Computer.
You now know all there is to know about the Nintendo Switch’s Album application.
It is time to move on to the Nintendo Switch Controllers function.
Learn about Nintendo Switch Controllers Menu
4) Nintendo Switch Controllers App
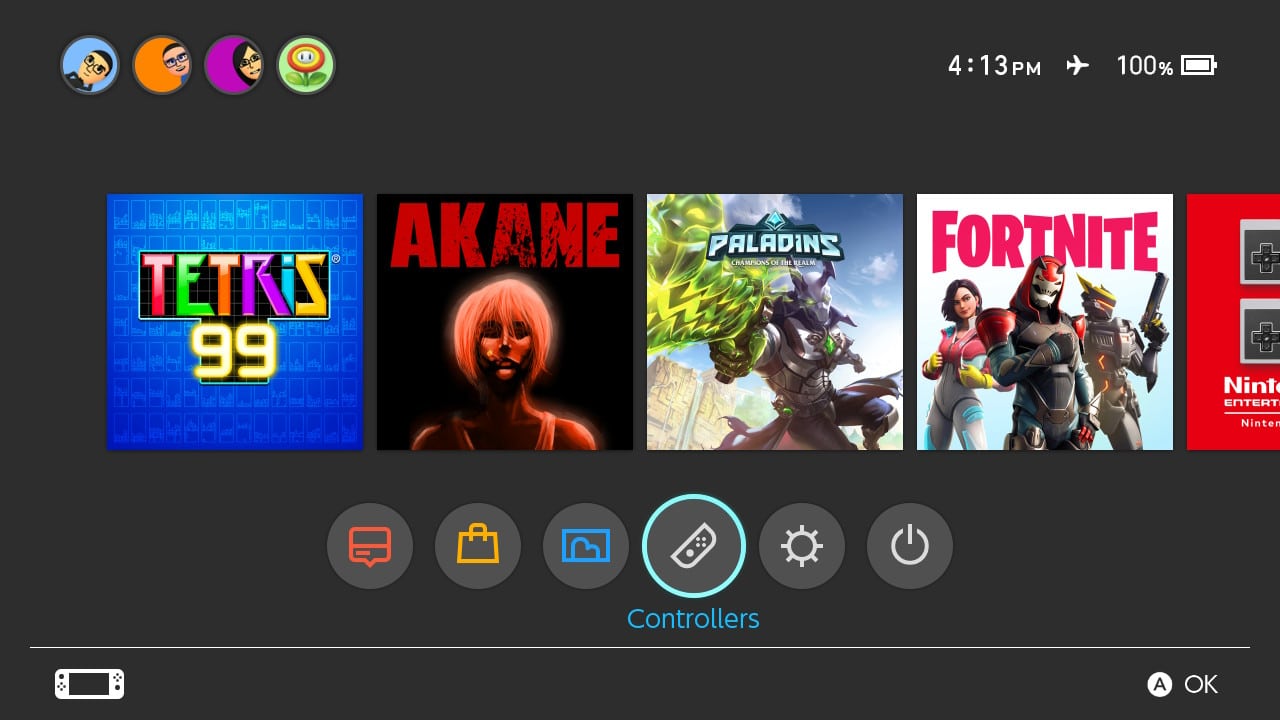
The Nintendo Switch Controller’s app is located at the bottom of the Nintendo Switch Home Screen and is the fourth icon from the left.
The controller application allows you to manage your controllers in many different ways.
The Controller feature gives you the freedom to
- Change your controller order
- Change what controller you are using
- Find nearby missing controllers
- Pair new controllers
- Check controller remaining battery
What do I use the Controller application for the most? I regularly check my controller’s remaining battery. I also own many different controllers for Nintendo Switch and like to change the controller I am using based on the game I am playing.
Being able to do these things quickly, efficiently, and painlessly has been a life saver many times over.
Now, I would like to delve deeper into each one of these functions.
Pressing the A button on the Controller app icon on the Nintendo Switch Home Screen will cause the Controller menu to appear.
You will be greeted with a picture of your Nintendo Switch and any connected Joy-Con controllers to the left of the screen along with thumbnail images of any controllers currently paired with your console.
Any compatible wireless controller with also show its remaining battery life. Small battery icons containing the battery life are viewable underneath the Nintendo Switch Console and wireless controller images.
This screen also shows what Player each paired controller is currently assigned to. There are 4 positions: Player 1, 2, 3, and 4.
Four gray squares above each controller will help identify each controller’s assignment. For each controller, one of the gray squares will be green. For example, Player 2’s controller will have a green square as its second square.
This is helpful to keep track of controllers and players when playing multiplayer games at home, at parties, or during game night.
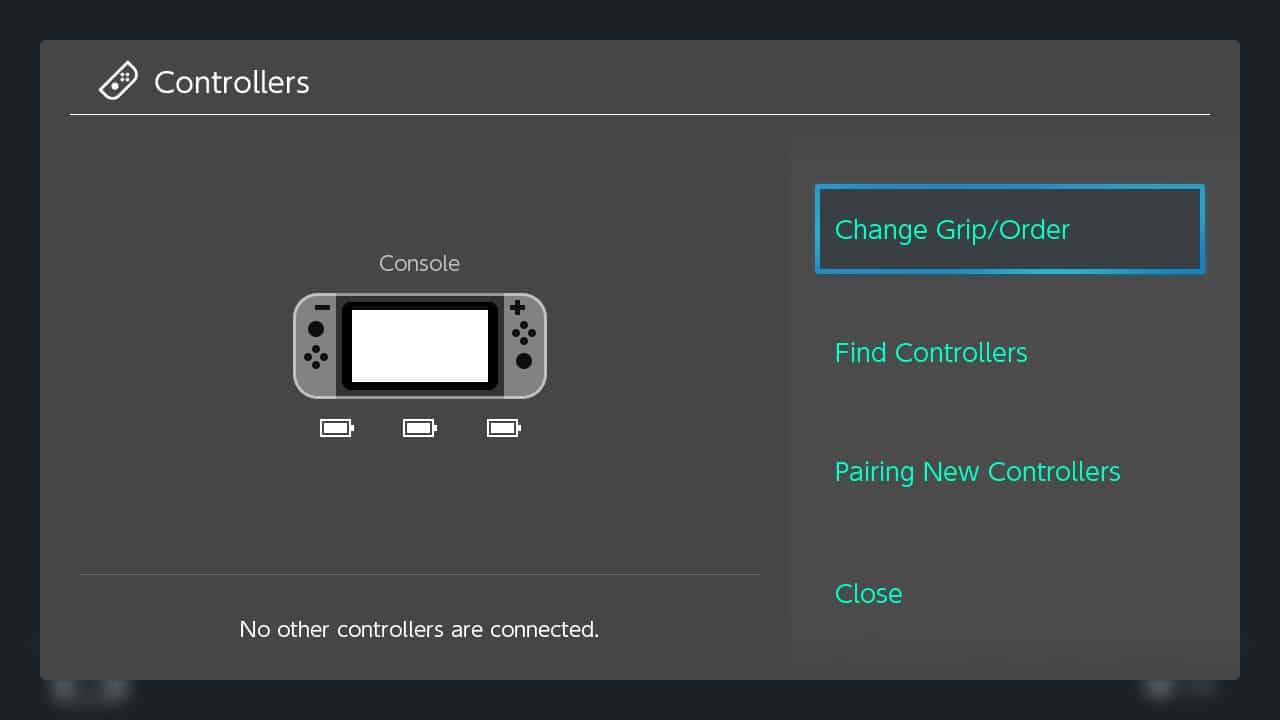
You will find four choices to the right of the Controllers application screen:
- Change Grip/Order
- Find Controllers
- Pairing New Controllers
- Close
-Change Grip/Order
Use this option to change the order of your controllers or to add and remove connected controllers.
Pressing A will automatically disconnect all of your connected controllers from the Nintendo Switch besides any Joy-Con physically attached to the Nintendo Switch Console.
You will then be taken to a new screen that prompts you to “Press L+R on the controller” you want to connect with you Nintendo Switch.
Pressing the L and R buttons on a specific controller will connect that controller with the Nintendo Switch.
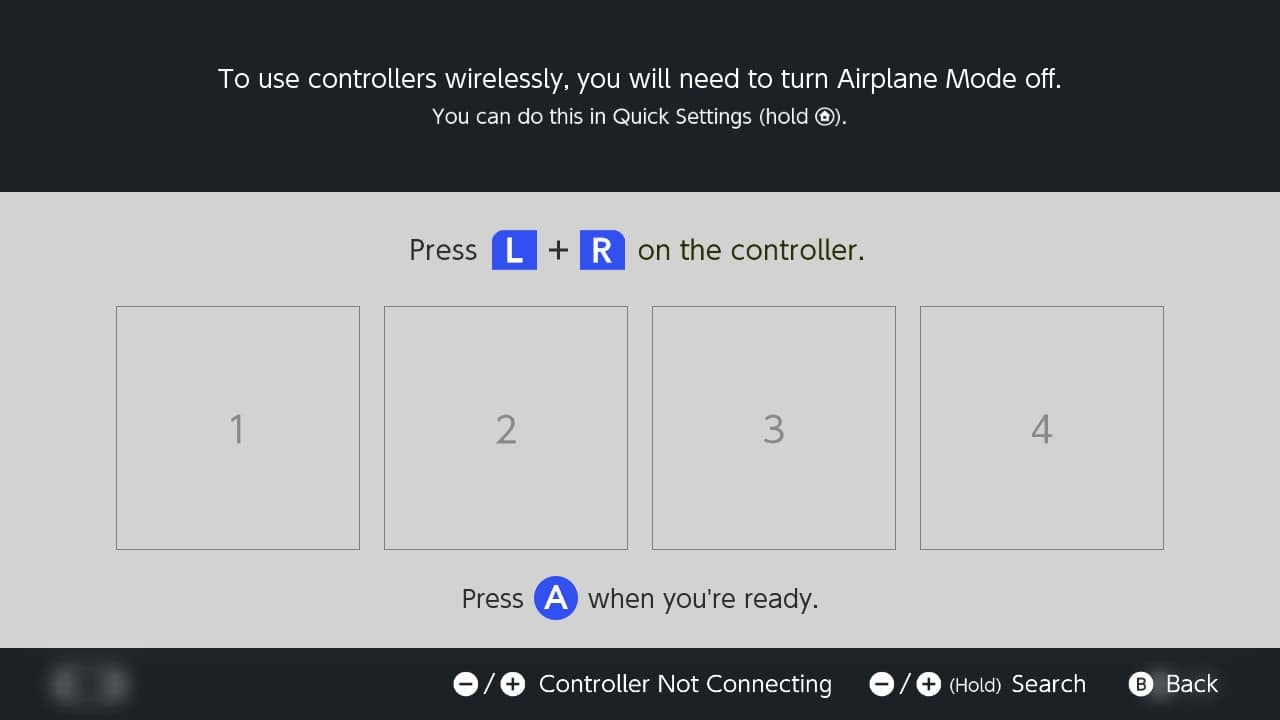
This is a really quick way to change Player order positions. If Player 1 would rather be Player 2 or 3 or 4 or vice versa, this menu is where that player will need to navigate to.
Also, this is a handy way to change physical controllers. I own a variety of Nintendo Switch controllers such as the standard Joy-Con, a few wired variants, a non-standard wireless controller, and many more. I find myself needing to change my controllers often. Using the Controller application allows me do this pain-free.
If you are playing in a group and a person wants to play with a wired controller or a wireless controller of perhaps even a personal controller that person brought to the gaming session, the Controller application is where you can configure player controllers.
How to Connect Nintendo Switch Wireless Controllers
- Make sure the wireless controller has enough battery. Charge it before hand if you have to.
- Enter the Controller app. Then, press the L and R buttons on the wireless controller you want connected.
- The wireless controller should now be connected and an image of the controller should appear on screen.
- Make sure you press L and R button on each wireless controller you want connected one at a time, separately. This will lower the chance of confusing your Nintendo Switch when it is trying to give order to the controllers you are trying to connect.
How to Connect Nintendo Switch Wired Controllers
- Connect your wired controller to one of the available USB ports on the Nintendo Switch dock. Wired controllers can only be officially used while the Nintendo Switch Console is inside the Dock. This is because the Nintendo Switch Dock has the USB ports, NOT on the tablet-like Nintendo Switch Console.
- Enter the Controller app. Then, press the L and R buttons on the wired controller you want connected.
- The wired controller should now be connected and an image of the controller should appear on screen.
- Make sure you press L and R button on each wired controller you want connected one at a time, separately. This will lower the chance of confusing your Nintendo Switch when it is trying to give order to the controllers you are trying to connect.
Controller Not Connecting Option
The methods above might not work sometimes. Bummer. If this ever happens, press the + or – button on a controller that is connected while you are still in the Change Grip/Order menu and you will be taken to the “Controller Not Connecting” screen.
The Controller Not Connecting option will take you to a troubleshooting slideshow that provides helpful information if a controller is not connecting properly. I found the slideshow’s information to be of great assistance.
It asks whether your controller is paired, attached, synced, properly connected by wired or wireless among other questions.
The slides provide illustrations and explanations along the way to help better explain how to solve a controller not connecting. Head here first as a refresher if you ever have a controller connection issue.
Search Option
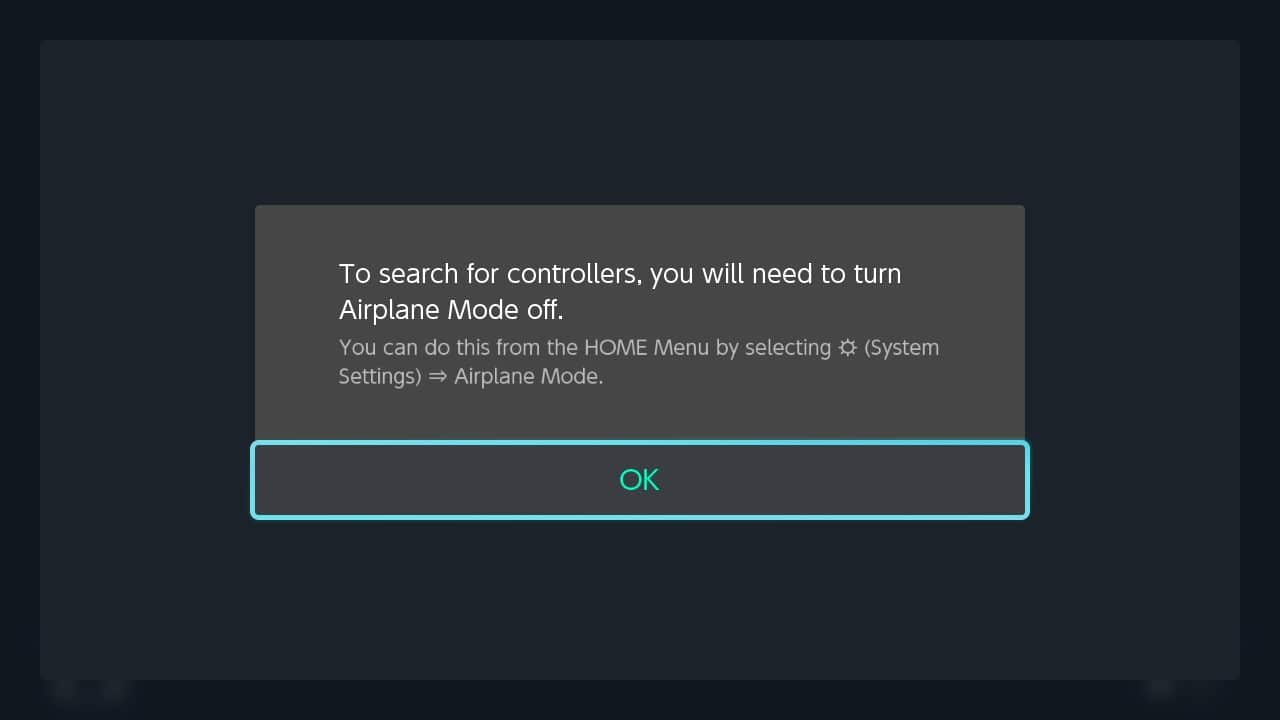
Using Search is great for those that have children, absent minded friends, or who themselves are absent minded. Don’t worry—I’ve misplaced things many times.
That is why the Nintendo Switch controller Search feature is handy: it locates any nearby wireless controller synced with the Nintendo Switch. Pretty handy, right?
Misplaced a Joy-Con? Think it might be in the couch, under the bed, or somewhere in the living room? Had a friend, child, neighbor, coworker misplace it? The Nintendo Switch can help.
Navigate back to the Change Grip/Order screen of the Controllers application. You should see “-/+ (Hold) Search” near the bottom right of the screen. Hold either the + or – button on a controller that is not lost in order to enter the Search menu.
A screen will pop saying “Controllers will be searched for by activating the vibration feature”. A list of controllers that have been synced and connected to the Nintendo Switch will be shown in the middle of the screen.
Navigate to and hover over an image of any controller that has been misplaced.
Pressing L or R buttons on an accessible connected controller will cause the selected misplaced controller to vibrate and make noise. Now, follow the vibration and noise to find your misplaced controller.
There is a menu at the bottom of the Search screen that reads “If controllers can’t be found”. This button will bring you to a screen that details reasons why you might not be able to locate a controller with the Search feature. It also provides tips if a controller can’t be found.
Things to Remember When Using the Search Feature:
- This feature is only useful for controllers. I cannot find the Nintendo Switch Dock or a microSD memory card, for example.
- This feature works even if a controller is off, but the controller must be in close proximity. I’ve found controllers at least 5 to 10 feet away from the Nintendo Switch console.
- Remain as quiet as possible in order to hear the vibration. The controller may be covered by a soft object such as a blanket.
- Turn off fans, air purifiers, and lower the volume on any noise producing hardware to better hear the controller’s vibration.
- Controllers without vibration can’t be found because they aren’t able to vibrate.
- Carry the Nintendo Switch Console around the area where you think you might have misplaced the controller. Try using the search function once more.
- A controller may not be found if it is too far away from the Nintendo Switch Console.
- A controller may not be found if the battery is low or completely drained.
- Search only works for wireless controllers. Unplugged wired controllers cannot be searched for as they do not have battery power.
- The search feature will not work for controllers not already paired with your Nintendo Switch or are paired with another Nintendo Switch.
The Nintendo Switch Search feature is a handy function I wish all electronic hardware would implement.
-Find Controllers
Now, head back to the Controller application main menu. The second of the four choices to the right of the screen reads “Find Controllers”.
This option will bring you to the controller “Search” menu outlined above.
-Pairing New Controllers
“Pairing New Controllers” is the final option on the Controller application main menu screen.
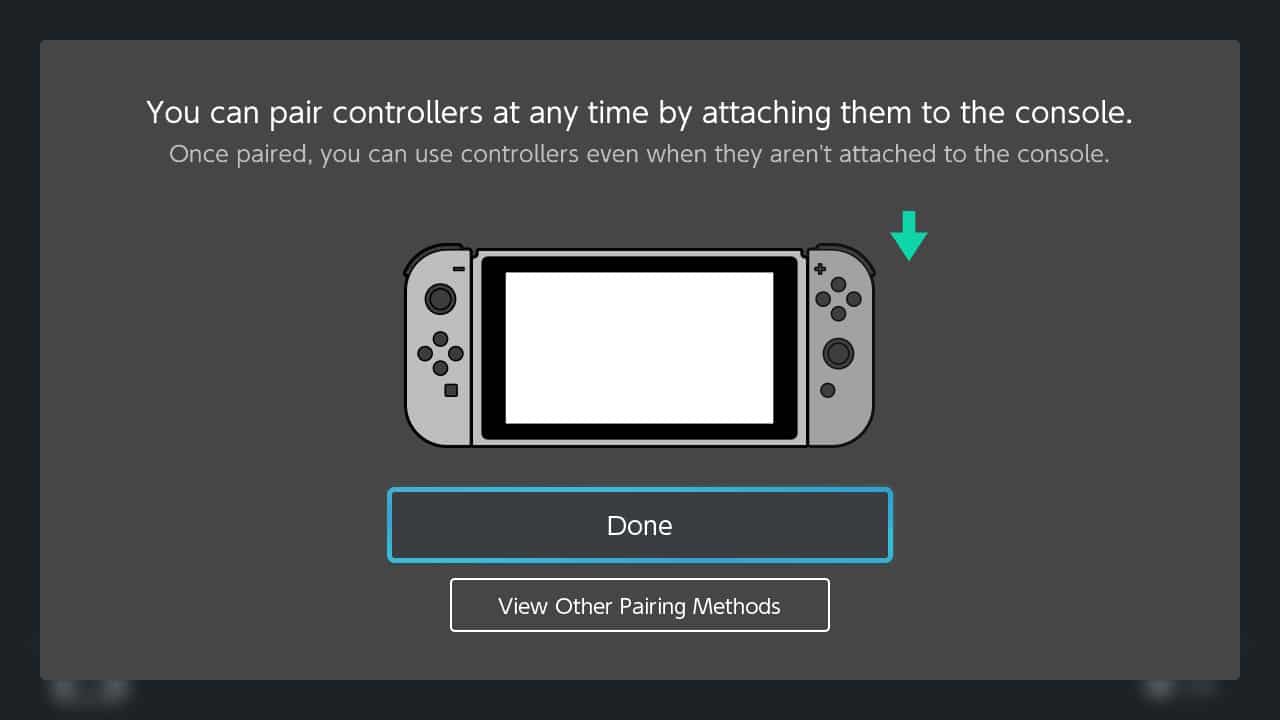
Pressing A will bring you to an animated screen of the Nintendo Switch console.
The primary way to pair a controller to a Nintendo Switch is by attaching it to the Nintendo Switch itself.
An on-screen animation will show you how to do this. Pressing the “Done” button at the bottom of the screen or the B button will take you back to the Controllers Menu screen.
Pressing the “View Other Pairing Methods” will take you to a screen that shows two other ways to pair a controller:
- Via a wired connection
- Via a wireless connection
Wired controllers can be paired by connecting the controller to the Nintendo Switch Dock with a USB cable.
Pairing wireless controllers requires users to navigate to the “Change Grip/Order” screen and pressing the Sync button on the wireless controller. Press the B button or pressing the “Close” button at the bottom of the View Other Pairing Methods screen will bring you back to the Controllers main menu.
-Close
Pressing the Close button at the bottom of the Controllers application’s main menu will take you back the Nintendo Switch’s home screen.
Onward, then, to the next awesome Nintendo Switch built-in application.
Learn about Nintendo Switch System Settings Menu
5) Nintendo Switch System Settings App

The Nintendo Switch System Settings is located at the bottom of the Nintendo Switch home screen and is the fourth fifth round icon from the left.
I believe this is the most powerful and most important application the Nintendo Switch has to offer. It will be so beneficial to familiarize yourself with the wealth of options available for you here.
- Support/Health & Safety
- Airplane Mode
- Screen Brightness
- Screen Lock
- Parental Controls
- Internet
- Data Management
- Users
- Mii
- amiibo
- Themes
- Notifications
- Sleep Mode
- Controllers and Sensors
- TV Settings
- System
These 16 options will allow you to tweak everything from aesthetic choices such as screen brightness, overall color themes for the background, and display colors to parental controls and system region.
Let us quickly cover the basics of the Nintendo Switch’s System Settings sub menus.
Support/Health & Safety
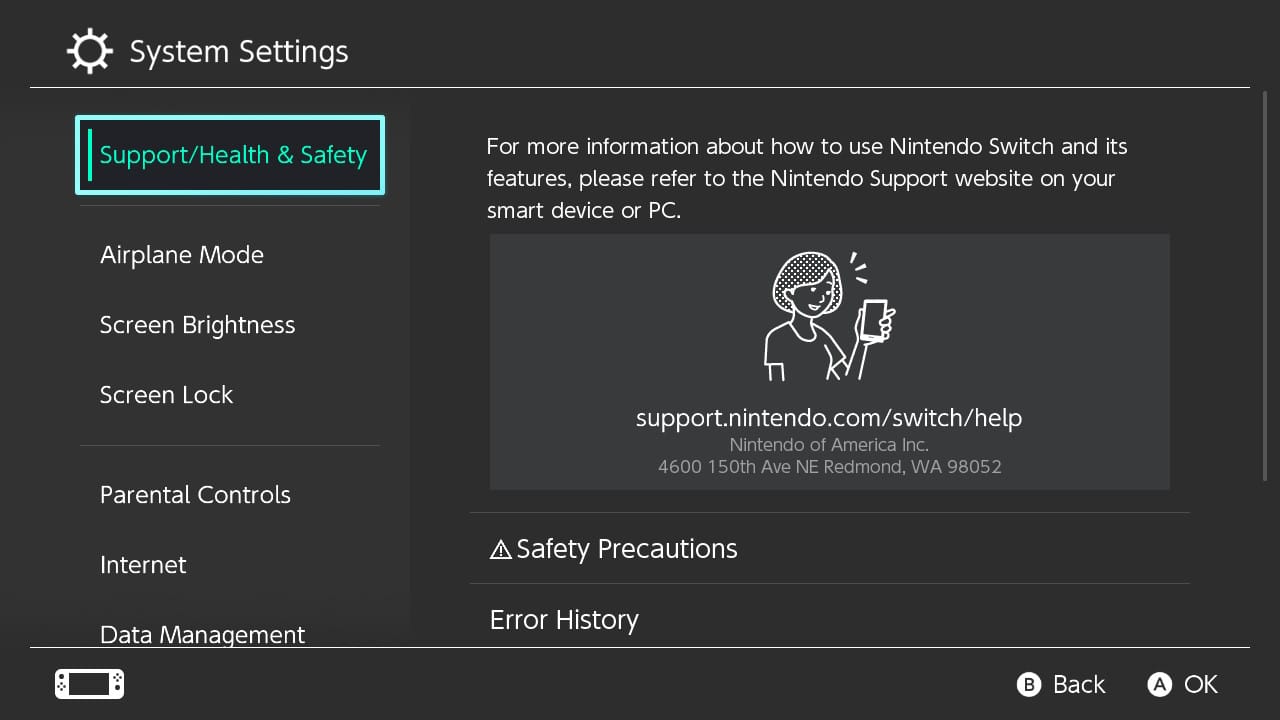
This option shows you safety precautions when using the Nintendo Switch.
Airplane Mode
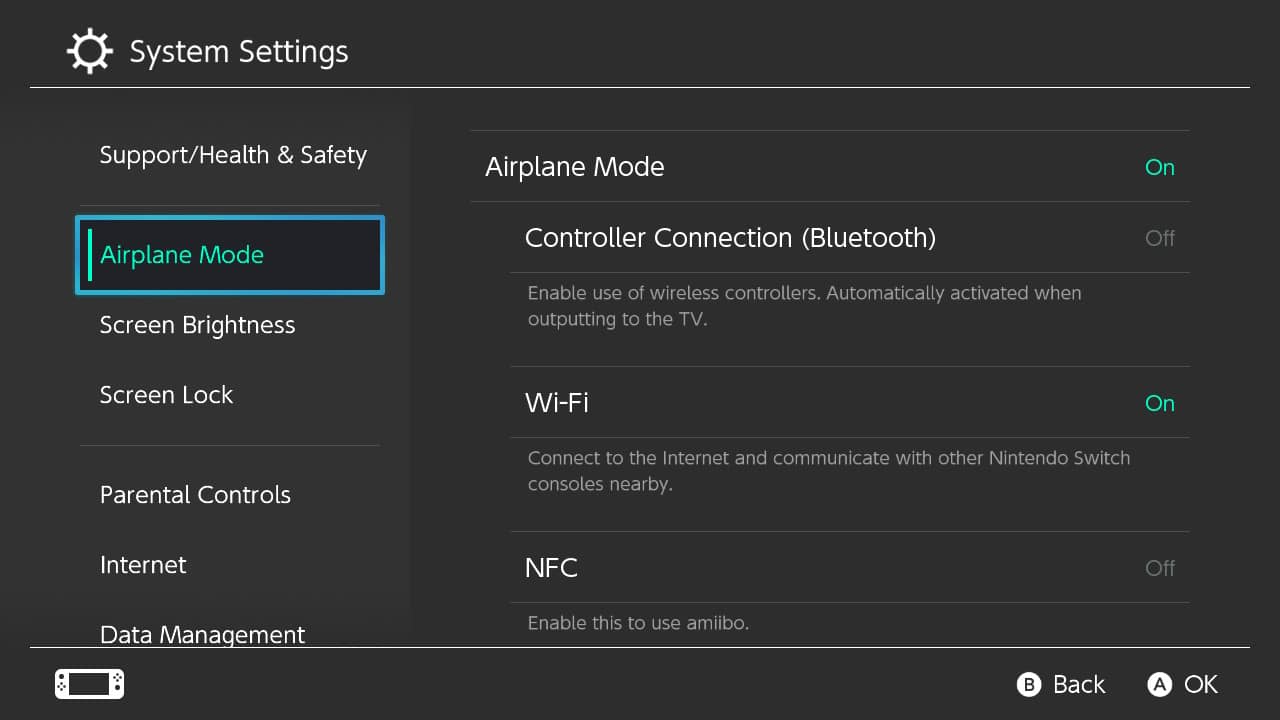
This is where you can turn on and off various wireless features.
Screen Brightness
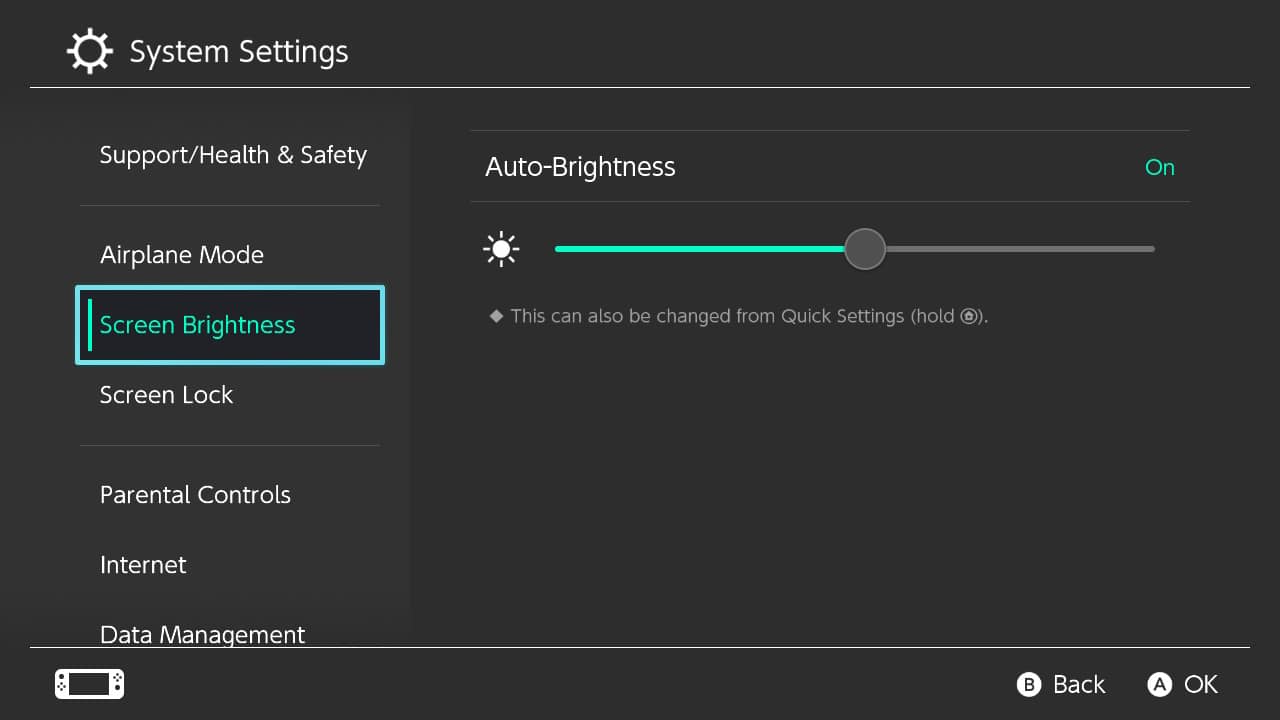
This is where you control the Nintendo Switch Console’s screen brightness.
Screen Lock
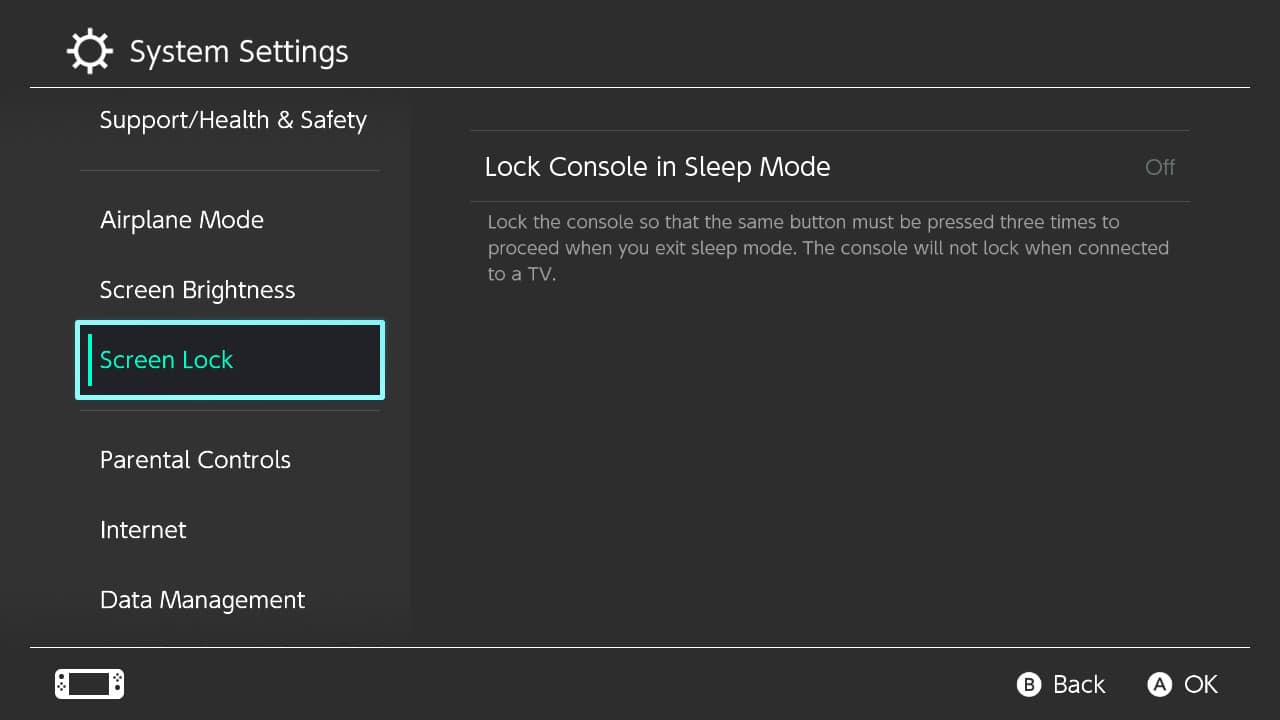
The Nintendo Switch’s lock screen options are here.
Parental Controls

Go here to restrict Nintendo Switch features you do not want children to access.
Internet
Manage internet settings and connections here.
Data Management
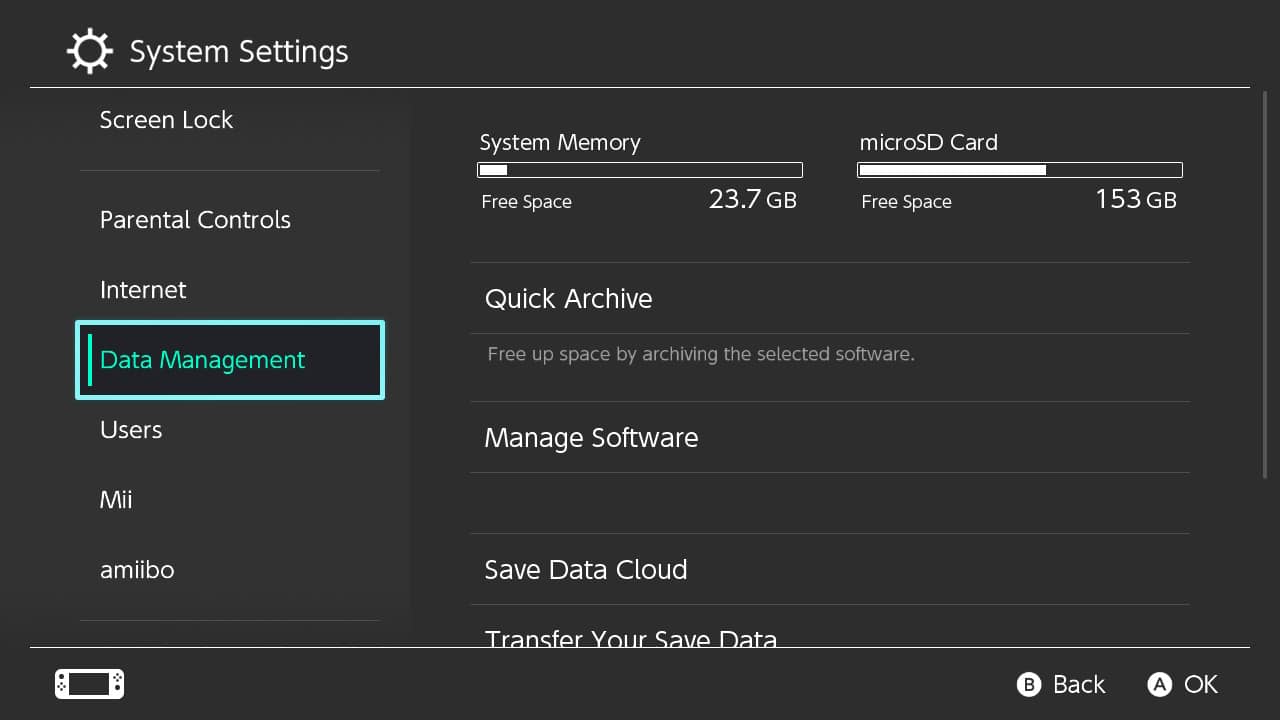
Archive, delete, backup, and tweak Nintendo Switch saved data and media content here.
Users
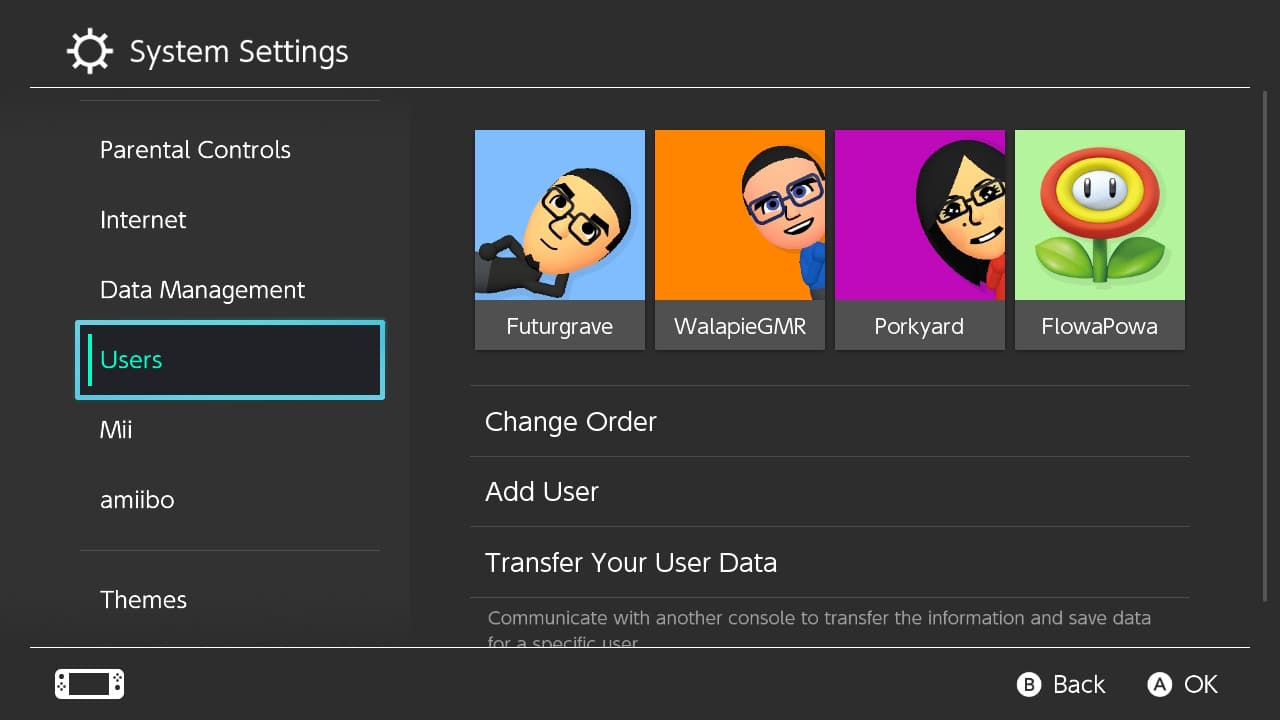
This option allows you to view, change, and add new Nintendo Switch user profiles.
Mii
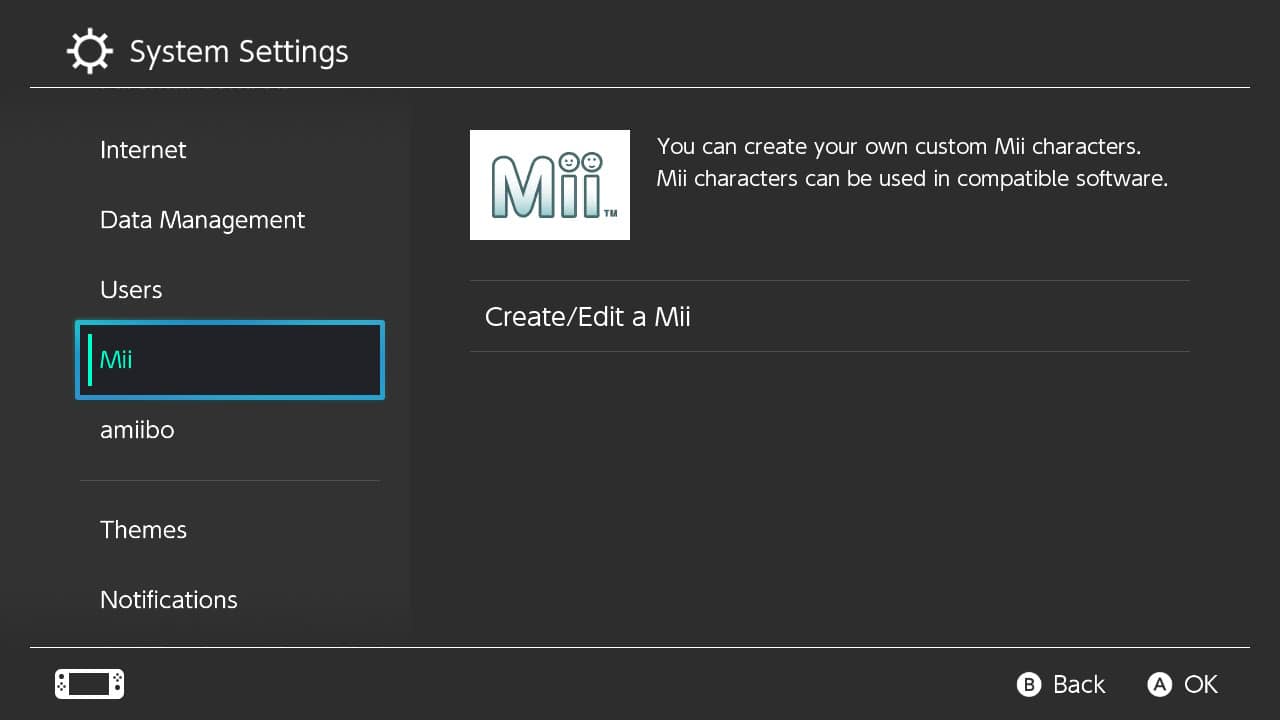
This option allows you to create and edit Mii characters made popular by Nintendo’s Wii home console.
amiibo
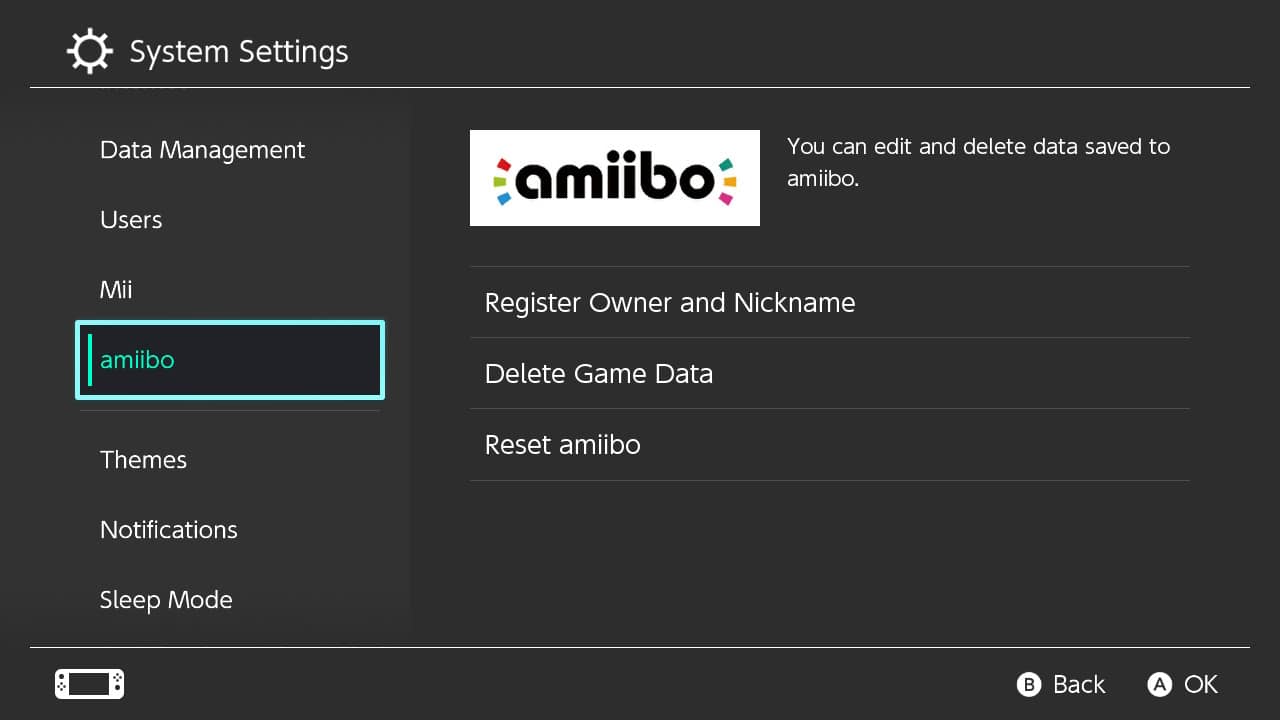
This option allows you to register and delete amiibo figurine data made popular by Nintendo’s home Wii U console.
Themes
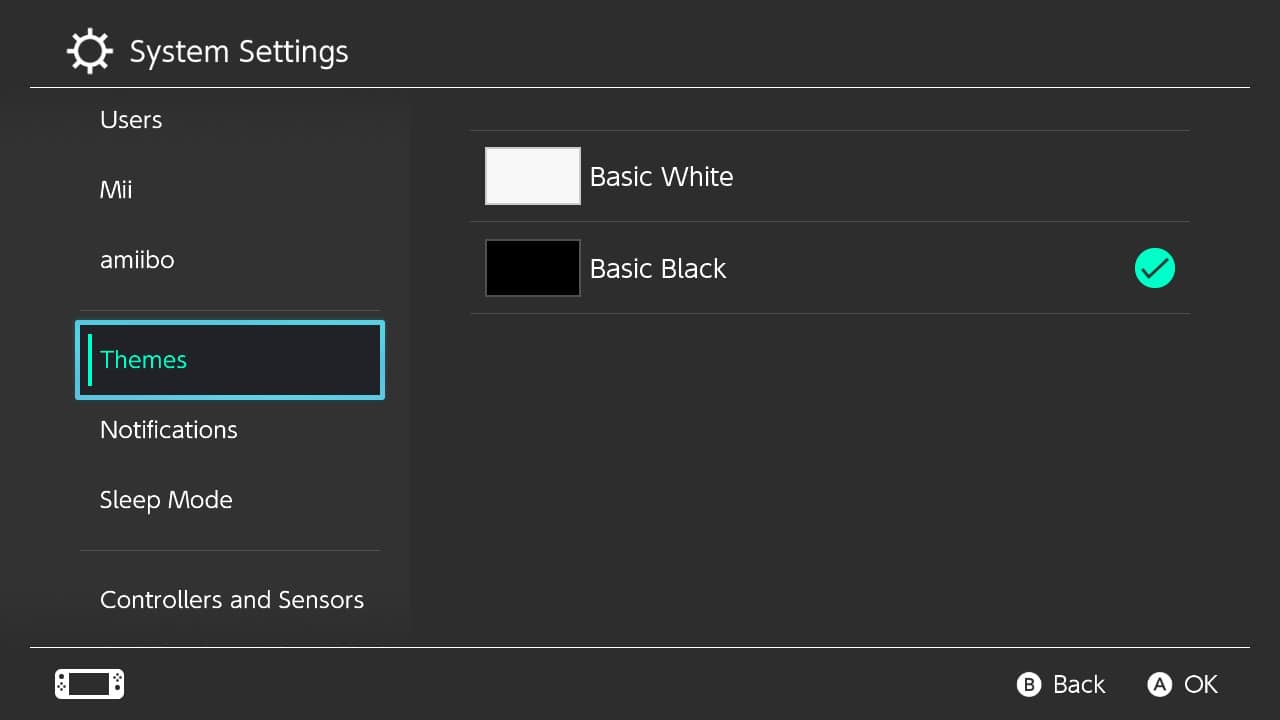
This option allows you to change the background and font colors of the Nintendo Switch menus.
Notifications
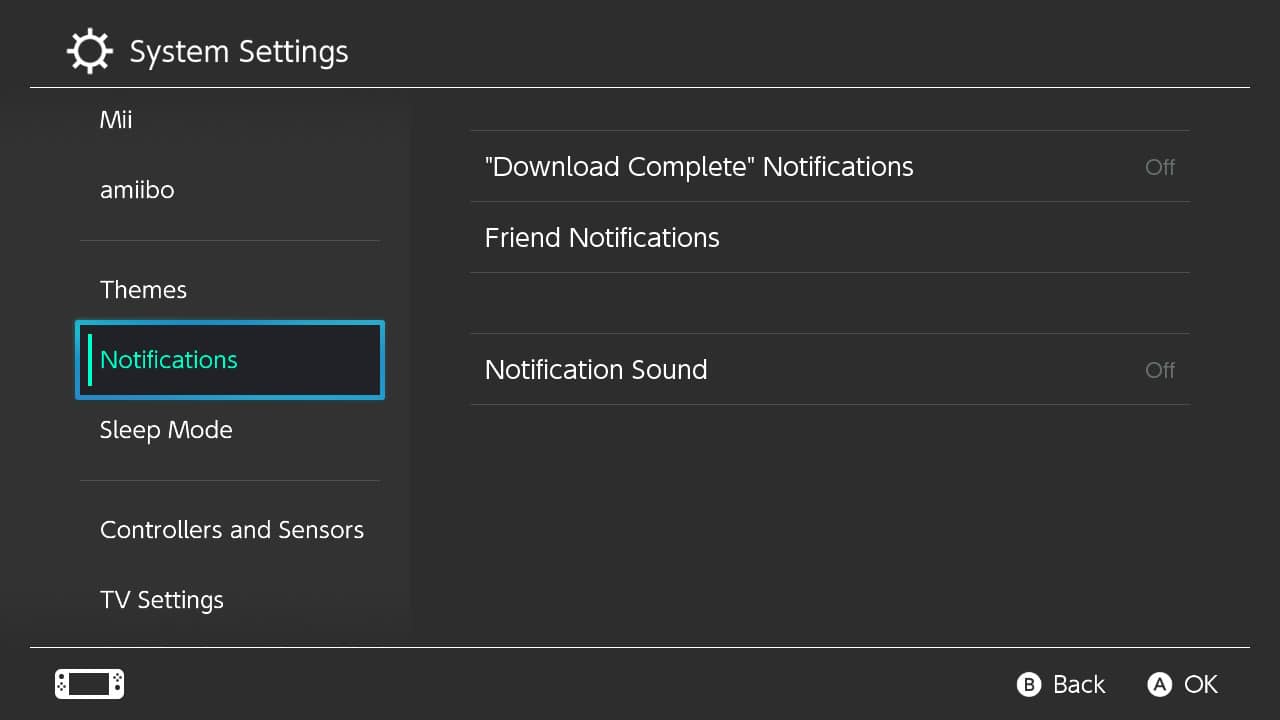
This option allows you to change on-screen notification settings.
Sleep Mode
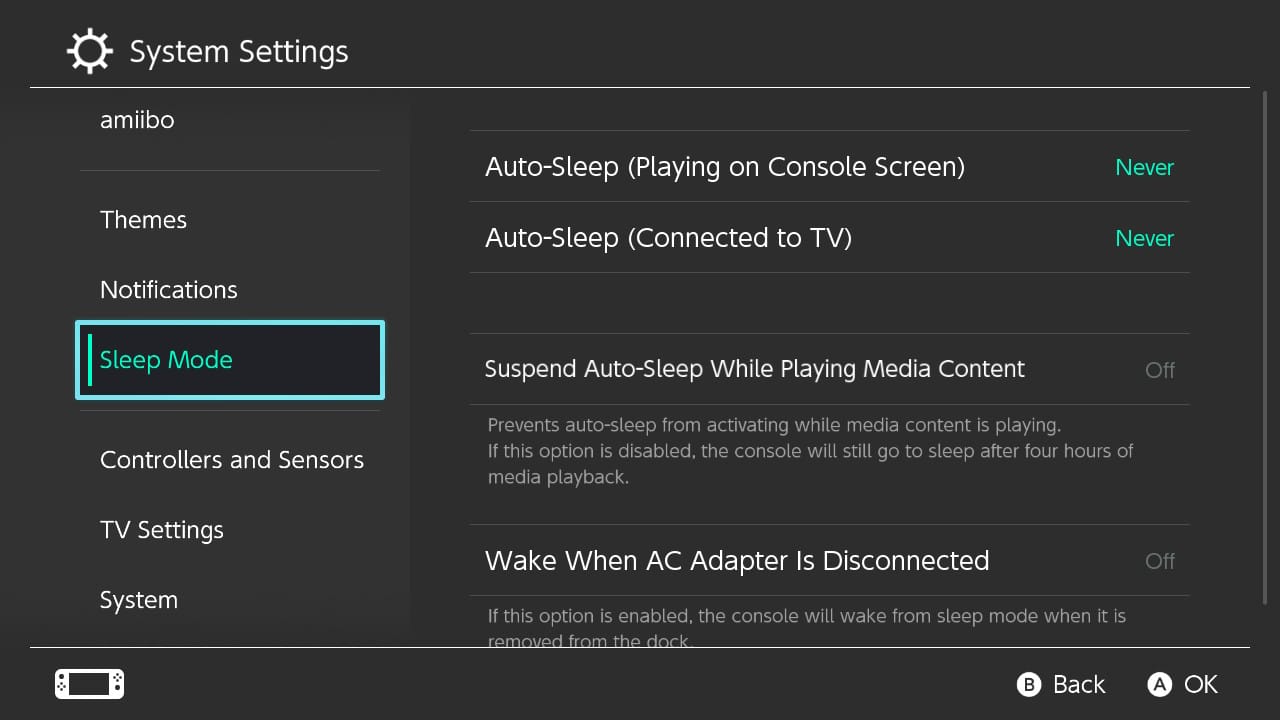
This option allows you to change the Nintendo Switch’s auto-sleep functions.
Controllers and Sensors
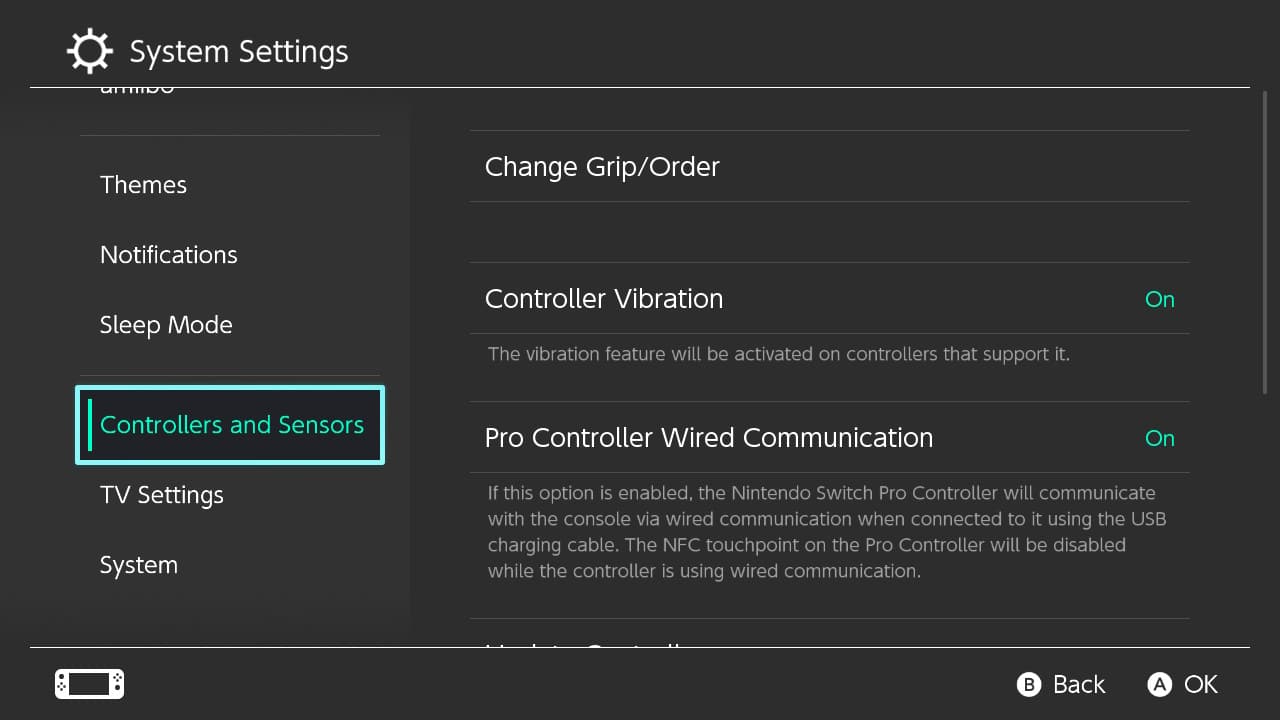
This option allows you to change various controller related functions.
TV Settings
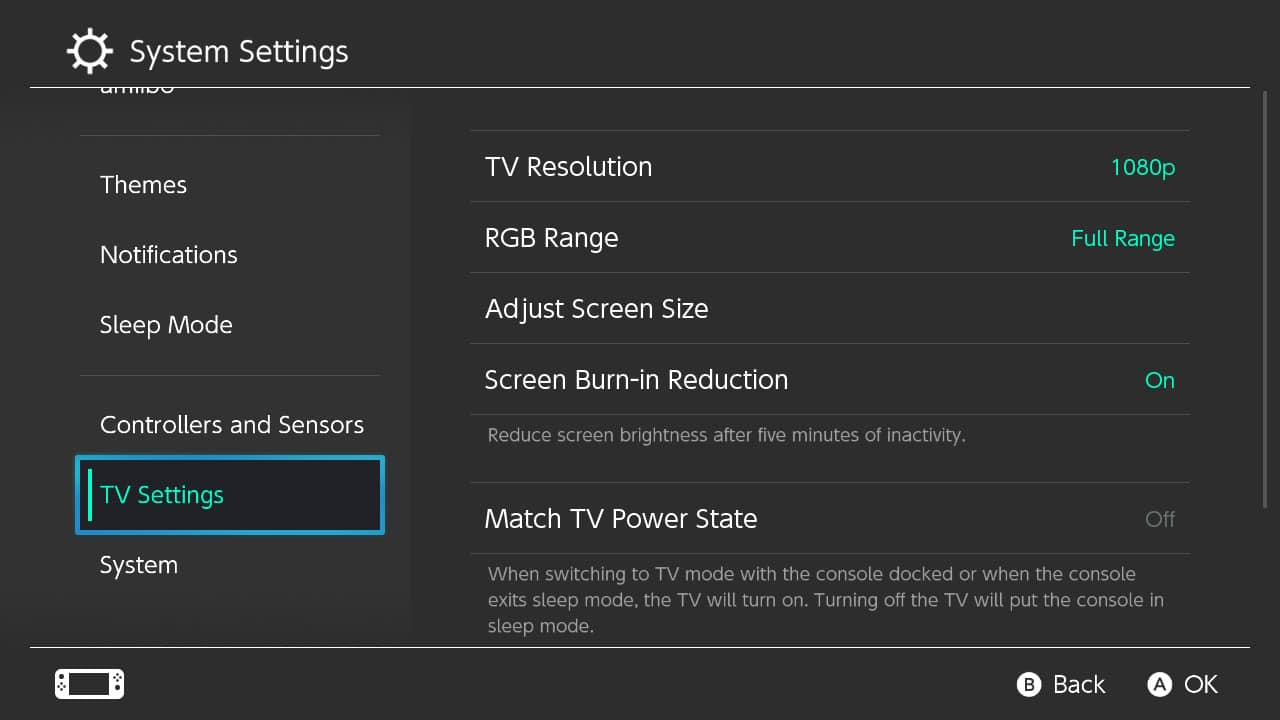
This option allows you to change television screen settings including resolution and screen size among other things.
System
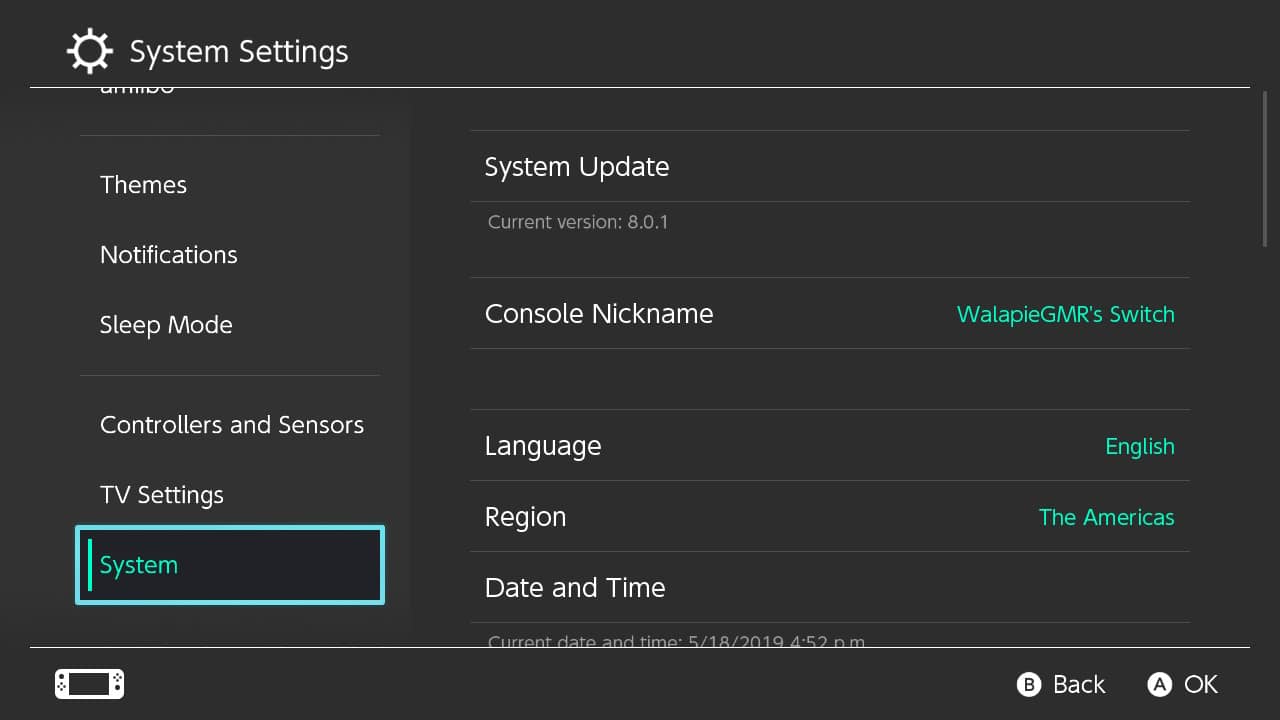
And, finally, this option provides you information about your Nintendo Switch system and more.
The System Settings application is so huge and has so much to it, I had to dedicate an entire guide covering every inch of it. This is a must-read for those who want full control over their Nintendo Switch (coming soon).
Now, we will move on to the final Nintendo Switch application.
Learn about Nintendo Switch Sleep Mode Menu
6) Nintendo Switch Sleep Mode App

The Nintendo Switch Sleep Mode is a good way to temporarily turn off the system without shutting down whatever application you are currently running. This is a great feature of Nintendo’s console that I use daily.
What is the Nintendo Switch Sleep Mode?
Sleep Mode shuts off the Nintendo Switch screen, volume, and other functions but keeps the Nintendo Switch console on in a low powered state.
Wireless activity remains on unless turned off before entering Sleep Mode. Regardless, battery life drains very slowly while the console is sleeping.
The Nintendo Switch Sleep Mode is similar to how smartphone and tablets work—the screen turns off yet the phone or tablet remains on. Exactly how the Nintendo Switch Sleep Mode works.
I have used this when I am in the middle of a game that I want to pick up later or need to abruptly leave my play session. Additionally, I tend to leave the Nintendo Switch Console in Sleep Mode overnight.
The Nintendo Switch is a modern electronic device designed to remain on in a low powered state, so feel free to use Sleep Mode to your heart’s content without fear.
If you aren’t going to play your Nintendo Switch for days or for prolonged periods of time, however, be sure to turn your Nintendo Switch off. Sleep Mode is best used for day-to-day use.
How to Use the Nintendo Switch Sleep Mode
The Nintendo Switch Sleep mode icon is located at the bottom of the Nintendo Switch’s home screen and is the last round button on the far right.
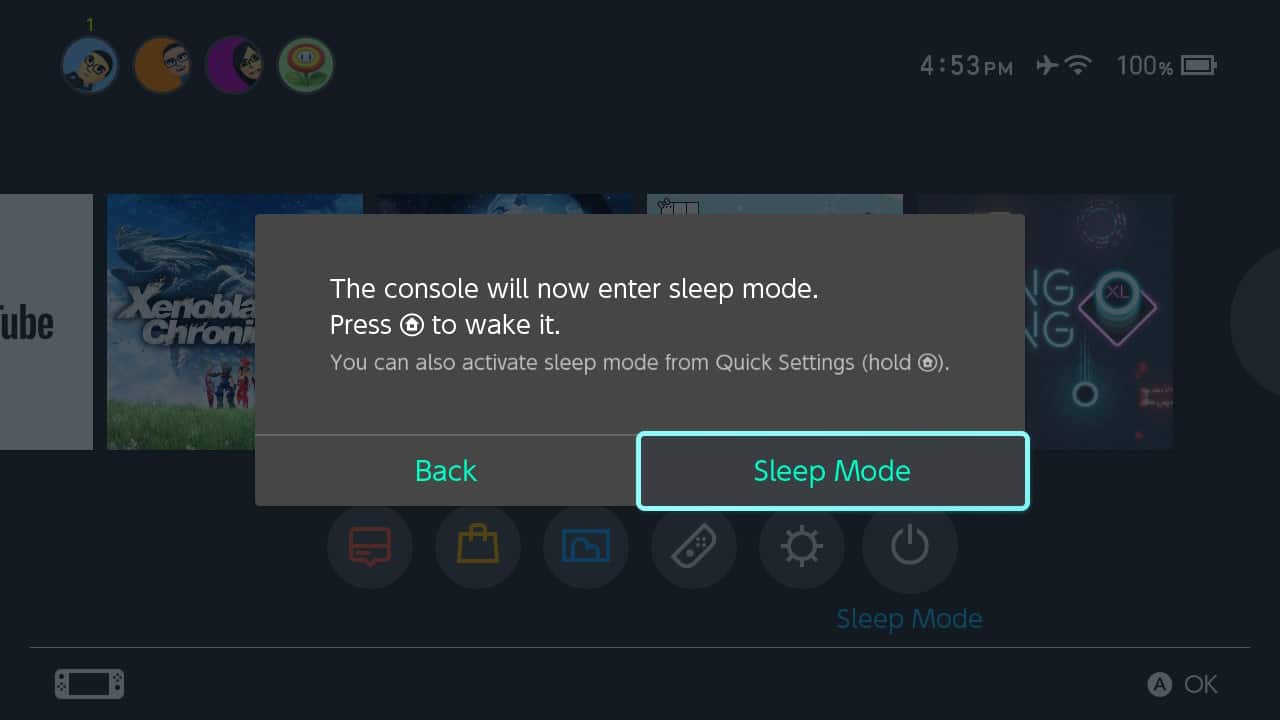
Pressing the A button while highlighting the Nintendo Switch Sleep Mode icon will cause a pop-up menu to appear on screen asking if you want to put your Nintendo Switch console into Sleep Mode.
Select “Sleep Mode” to put your Nintendo Switch into a low powered state or select “Back” to return to the Nintendo Switch Home Screen.
You can also activate Sleep Mode by holding the home button on the right side of your controller. This will cause the Quick Settings screen to appear in which you can select to put your Nintendo Switch to sleep.
Conclusion
This wraps up the How to Use Your Nintendo Switch guide.
You now know how to use the Nintendo Switch. Congratulations!
There are so many features that could have easily been missed or forgotten, but I hope this extensive two-part guide has been helpful in exploring everything there is to know about Nintendo’s hybrid console.
By Wally
(Screenshots taken by me. Images sourced from product pages on the Nintendo website. Logos, characters, and images are owned by their respective owners)